Chocolate Covered Strawberries: Glossy Shell
- Time: Active 20 minutes, Passive 35 minutes, Total 55 minutes
- Flavor/Texture Hook: A velvety chocolate shell that provides a satisfying shatter against a juicy, tart berry.
- Perfect for: Last minute gifts, romantic dates, or a beginner friendly dessert platter.
- Mastering These Easy Chocolate Covered Strawberries
- Science Behind a Perfect Chocolate Snap
- Selecting Your Essential Dipping Ingredients
- Simple Tools for Stress Free Prep
- Reliable Steps for Glossy Berries
- Fixes for Common Dipping Blunders
- Dietary Adjustments and Creative Twists
- Keeping Your Berries Fresh
- Presentation and Pairing Ideas
- Recipe FAQs
- 📝 Recipe Card
Mastering These Easy Chocolate Covered Strawberries
I still remember the first time I tried making these for a friend's baby shower. I thought I was being so efficient by washing the strawberries right before dipping them. It was a total disaster. The chocolate literally slid off the berries like a wet raincoat, leaving me with a muddy mess and a pile of naked fruit.
I ended up hiding the bowl in the back of the fridge, hoping no one would ask about dessert.
Since then, I've realized that making Chocolate Covered Strawberries isn't about being a pastry chef; it's about respecting the physics of water and fat. When you get that velvety chocolate to actually stick, and you hear that distinct snap when you take a bite, it feels like a massive win.
We're going to skip the complicated tempering thermometers and stick to a method that actually works in a real kitchen with a microwave and a couple of bowls.
This recipe is designed for those of us who want that high end boutique look without the stress. We'll focus on getting the berries bone dry and the chocolate at just the right consistency.
Trust me, once you see that glossy shell harden into a beautiful finish, you'll never buy the overpriced store-bought versions again. Let's get into the details of how to make this happen without the kitchen drama.
Science Behind a Perfect Chocolate Snap
Moisture Barrier: Chocolate is essentially fat and sugar, and it absolutely hates water. Even a tiny drop of moisture on the berry surface will cause the chocolate to "seize," turning it from a silky liquid into a gritty, clumpy mess. Drying the berries is the most important chemical step you'll take.
Emulsification Stability: Adding refined coconut oil to the dark chocolate wafers helps thin the mixture just enough. This lower viscosity allows the chocolate to flow smoothly over the berry's curves, resulting in a thin, professional looking shell rather than a thick, clumpy layer.
Fat Crystallization: By using dark chocolate wafers with at least 60% cacao, we are working with a higher concentration of cocoa butter. When chilled correctly, these fats align into a stable structure that provides that signature "shatter" texture when bitten, rather than a soft, fudge like feel.
Managing Surface Moisture
The key to preventing your coating from slipping is managing the "sweat" of the fruit. When a cold berry hits warm chocolate, it creates a microscopic layer of steam. This is why we always bring the berries to room temperature before we even think about dipping.
It sounds simple, but it’s the difference between success and failure.
The 2 Step Cheat Melt
Instead of a double boiler, which often introduces risky steam, we use short microwave bursts. This controlled heating prevents the sugar in the chocolate from scorching. By stirring frequently, we use the residual heat of the melted wafers to melt the remaining solids, which is a shortcut way to keep the chocolate stable.
The Fat to Snap Ratio
The tsp of refined coconut oil is our secret weapon here. It creates a more flexible fat bond. While we want a snap, we don't want the chocolate to be so brittle that it completely falls apart the moment you touch it. The oil provides just enough "give" to keep the coating intact while it sets.
| Fresh Strawberries | Shortcut (Frozen) | Why Fresh Wins |
|---|---|---|
| Firm texture, easy to grip | Mushy once thawed | Frozen berries release too much juice, making the chocolate slide off instantly. |
| Naturally sweet and tart | Can be overly acidic | Fresh fruit has the structural integrity to hold the weight of the chocolate. |
| Bright green leaves | Usually leaf less | The leaves act as a natural handle for dipping, keeping your fingers clean. |
A quick note for those looking for more dessert inspiration: this technique for handling fruit and chocolate is very similar to the prep work needed for a Chocolate Covered Strawberries recipe if you're looking for a larger batch for a party.
Selecting Your Essential Dipping Ingredients
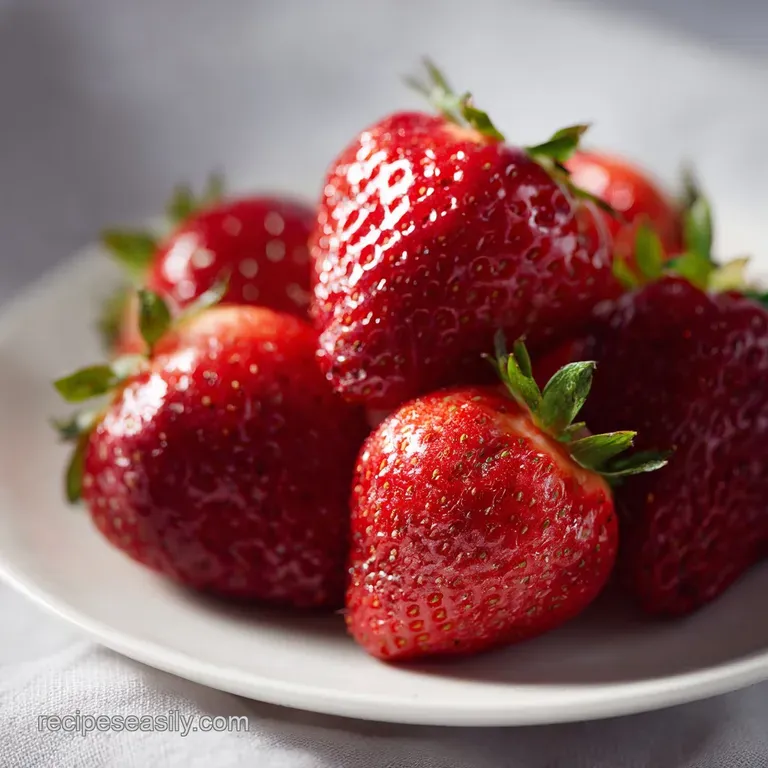
The quality of your ingredients dictates the final result here. Since we are only using four items, there's nowhere to hide. Look for berries that are bright red all the way to the top; white shoulders on a strawberry usually mean they'll be tart and crunchy rather than sweet and juicy.
| Ingredient | Science Role | Pro Secret |
|---|---|---|
| Dark Chocolate (10 oz) | Primary structure | Use wafers, not chips; chips have stabilizers that prevent a smooth melt. |
| Refined Coconut Oil (1 tsp) | Viscosity control | Refined oil has zero coconut taste but adds a high gloss, professional sheen. |
| White Chocolate (4 oz) | Decorative contrast | Melt this separately and only at 50% power to prevent the delicate milk solids from burning. |
- 1 lb fresh strawberries: Look for medium sized fruit with healthy green stems. Why this? Oversized berries are often hollow and watery inside.
- Substitute: Large raspberries (but they are much more fragile).
- 10 oz dark chocolate wafers: Aim for 60% cacao or higher for the best flavor balance. Why this? High cacao content ensures the chocolate isn't cloyingly sweet.
- Substitute: Semisweet chocolate bars, finely chopped.
- 1 tsp refined coconut oil: This helps the chocolate stay glossy and flow better. Why this? It lowers the melting point slightly for a smoother dip.
- Substitute: 1 tsp of vegetable shortening.
- 4 oz white chocolate wafers: Used for drizzling and decoration. Why this? Provides a sharp visual contrast against the dark base.
- Substitute: Melted peanut butter or almond butter for a different flavor profile.
Simple Tools for Stress Free Prep
You really don't need a pantry full of gadgets to pull this off. The most important "tool" is actually a humble sheet of parchment paper. If you try to set these on a plate or a bare baking sheet, they will stick, and you'll lose the bottom half of your chocolate shell when you try to pick them up.
Building Your Dipping Station
Line a large baking sheet with parchment paper or a silicone mat. Place your dried berries on one side and leave a clear space on the other for the finished products. Having a clear workflow from raw fruit to dipping bowl to drying rack prevents you from dripping chocolate across your counter.
Chef's Tip: Use a tall, narrow glass or a small deep bowl for the melted chocolate rather than a wide, shallow one. This creates a "deep pool" that makes it much easier to submerge the berry in one clean motion without hitting the bottom of the container.
For the drizzle, a simple sandwich bag with the corner snipped off works better than any fancy piping tool I've ever bought. It gives you great control, and you can just toss it when you're done. No cleaning sticky chocolate out of tiny piping tips today!
Reliable Steps for Glossy Berries

- Prep the berries. Wash the 1 lb of strawberries in cool water and immediately pat them dry with paper towels. Note: This prevents water from sitting on the skin.
- Air dry completely. Lay the berries on a clean kitchen towel for at least 30 minutes until the skins feel matte and not slick.
- Melt the dark chocolate. Place 10 oz of dark wafers and 1 tsp of coconut oil in a microwave safe bowl. Note: Use a ceramic or glass bowl for even heat.
- Heat in intervals. Microwave for 30 seconds, then stir vigorously with a rubber spatula.
- Finish the melt. Continue microwaving in 15 second bursts until the chocolate is silky and flows like ribbons.
- Dip the berries. Hold a strawberry by the green stem and submerge it into the dark chocolate. Note: Twist slightly as you pull it out to let excess drip off.
- Set on parchment. Place the dipped berry onto the lined sheet until the base forms a small, stable "foot".
- Melt the white chocolate. Repeat the melting process with 4 oz of white chocolate wafers at 50% power.
- Add the drizzle. Transfer white chocolate to a baggie, snip the corner, and wave it back and forth over the berries until a thin, zigzag pattern forms.
- Final chill. Place the tray in the fridge for 35 minutes until the shells are firm and no longer shiny.
Fixes for Common Dipping Blunders
The biggest heartbreak in the kitchen is when your beautiful chocolate suddenly turns into a thick, crumbly paste. This usually happens because a stray drop of water got into the bowl or the chocolate was overheated.
If it's just starting to thicken, you can sometimes save it by stirring in a half teaspoon of coconut oil, but usually, it's a sign to start fresh with a clean, dry bowl.
Handling Seized Chocolate
If your chocolate gets chunky, it has "seized." This is a chemical reaction where the sugar crystals clump together because of moisture. You can try to add a tablespoon of boiling water and whisk vigorously; it will turn the chocolate into a sauce rather than a dipping shell, but at least you can use it over ice cream instead of throwing it away!
Preventing Berry Sweat
When you take the berries out of the fridge, they might develop little beads of water on the surface. This is condensation. To avoid this, don't leave them in the fridge for more than an hour. Once they are set, they are actually happiest at a cool room temperature.
If you must keep them in the fridge longer, place a paper towel in the container to absorb that extra moisture.
| Problem | Root Cause | Solution |
|---|---|---|
| Chocolate is clumpy | Water contamination | Keep all tools bone dry; never cover the melting bowl with a lid. |
| Coating is sliding | Berries were too cold | Allow fruit to reach room temperature before dipping to prevent condensation. |
| Drizzle is thick | White chocolate overheated | Melt in shorter bursts; white chocolate has a much lower burning point than dark. |
Common Mistakes Checklist
- ✓ Never use frozen strawberries; they turn to mush immediately upon contact with heat.
- ✓ Avoid using plastic bowls for melting, as they can retain oils and moisture from previous meals.
- ✓ Don't skip the coconut oil; it provides the necessary "slip" for a thin, even coating.
- ✓ Always let the berries air dry after towel drying; hidden moisture near the stem is a silent killer.
- ✓ Resist the urge to move the berries once they touch the parchment until they are fully set.
Dietary Adjustments and Creative Twists
If you're cooking for someone with dietary restrictions, these are actually quite easy to adapt. For a dairy-free version, look for high-quality vegan dark chocolate wafers. Most dark chocolate with a high cacao percentage (70%+) is naturally dairy-free, but always check the label for milk solids.
Vegan and dairy-free Options
You can replace the white chocolate drizzle with a mixture of melted coconut butter and a touch of maple syrup. It sets firmly and provides that same beautiful contrast without the dairy. For another fun twist, try the technique used in this Chocolate Valentine Tarts recipe to create a mini tart base for your strawberries.
Festive Flavor Variations
- The Nutty Crunch: Roll the berries in finely chopped toasted hazelnuts or pistachios immediately after dipping in the dark chocolate, before it sets.
- The Salty Sweet: Sprinkle a tiny pinch of flaky sea salt (like Maldon) over the white chocolate drizzle while it's still wet.
- The Spice Kick: Whisk a pinch of cayenne pepper or cinnamon into the dark chocolate for a Mexican chocolate inspired heat that pairs beautifully with the berries.
Keeping Your Berries Fresh
Chocolate Covered Strawberries are at their absolute peak within 6 to 12 hours of being made. After that, the strawberry begins to release its natural juices, which can break down the chocolate from the inside out.
If you need to store them, keep them in a single layer in a container lined with paper towels, and do not seal the lid completely. A bit of airflow prevents the dreaded "sweat."
I don't recommend freezing these. Strawberries have a high water content, and when they freeze, the cell walls burst. When they thaw, you'll be left with a soft, watery mess inside a cracked chocolate shell. It’s a texture nightmare!
If you have leftovers, chop them up and stir them into a bowl of vanilla yogurt or oatmeal the next morning the "zero waste" way to enjoy the remnants.
Presentation and Pairing Ideas
If you want to go full "hostess with the mostess," arrange these on a marble slab or a wooden charcuterie board. The contrast between the dark chocolate and the stone or wood looks incredible. Surround them with small bowls of nuts, some dried apricots, and maybe a few sprigs of mint for a pop of color.
Serving on a Board
I love grouping them by design put the drizzled ones in the center and the plain dark ones around the edges. It makes the platter look intentional and high end. If you're serving these at a party, keep them away from direct sunlight or heat sources like a fireplace, as the chocolate will soften quickly and get messy for your guests to handle.
Drinks that Match Chocolate
Pairing these with a dry Prosecco or a Champagne is a classic for a reason. The acidity of the bubbles cuts through the richness of the chocolate and cleanses the palate between bites. If you're looking for a non alcoholic option, a cold brew coffee or a tart hibiscus tea provides a great counterpoint to the sweetness.
Whatever you choose, serve it cold to match the refreshing snap of the fruit!
For a different take on the chocolate fruit combo, you might also enjoy making a Valentine Chocolate Chip recipe to serve alongside your berries for a full dessert spread.

Recipe FAQs
Why do people give strawberries on Valentine's Day?
Yes, they are strongly associated with the holiday. Strawberries are visually rich red, symbolizing passion, and their heart shape makes them an immediate romantic gesture.
What fruit is associated with Valentine's Day?
The strawberry is the most iconic fruit. Its bright color and natural heart shape align perfectly with the traditional romantic imagery of Valentine's Day.
What do strawberries symbolize in love?
They symbolize purity, passion, and fertility. The vibrant red color is universally linked to the heart and deep affection, making them a classic romantic gift.
What do strawberries symbolize?
Strawberries generally symbolize devotion and sweetness. In some traditions, the perfectly formed berry represents Venus, the goddess of love.
Is it true that if the chocolate coating slides off, the berries were too cold?
Yes, this is the most common cause of coating failure. Dipping a cold berry into warm chocolate causes immediate condensation (sweat), creating a moisture barrier that prevents the chocolate fat from adhering properly.
How to melt chocolate wafers without seizing them?
Microwave at 50% power in 20-second intervals. Stir between each interval to prevent scorching, ensuring residual heat melts the remaining solids smoothly.
Can I substitute fresh strawberries with frozen ones for dipping?
No, stick with fresh. Frozen berries release excessive moisture upon thawing, which causes the chocolate coating to slide off or seize immediately after dipping.
Glossy Chocolate Covered Strawberries
Ingredients:
Instructions:
Nutrition Facts:
| Calories | 118 kcal |
|---|---|
| Protein | 1.2 g |
| Fat | 6.6 g |
| Carbs | 13.8 g |
| Fiber | 1.5 g |
| Sugar | 10.9 g |
| Sodium | 5 mg |
