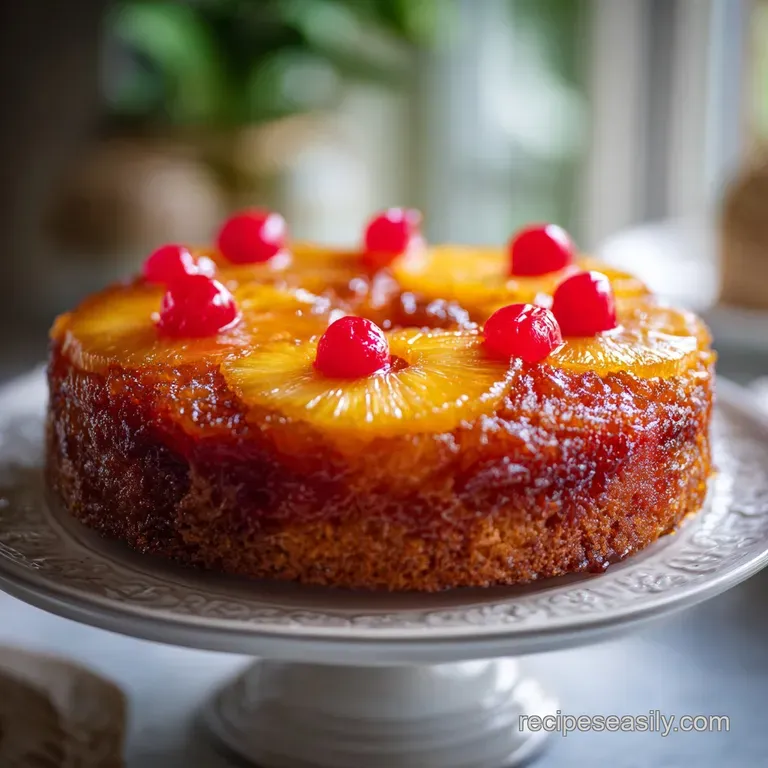
Pineapple Upside Down Cake: Buttery and Moist
- Time: Active 20 minutes, Passive 45 minutes, Total 65 minutes
- Flavor/Texture Hook: A buttery, toffee crusted topping with a velvety vanilla crumb
- Perfect for: Cozy Sunday brunches or a vintage themed dinner party
- Master the Iconic Pineapple Upside Down Cake
- Why Skillet Method Creates Perfect Caramel
- Essential Numbers for Your Success
- The Alchemy of Selecting Components
- Minimal Tools for Your Success
- A Detailed Roadmap to Baking
- Solving Every Potential Cake Problem
- Swaps and Twists for Your Batch
- Saving and Reviving Your Sweet Leftovers
- The Best Ways to Plate and Enjoy
- Kitchen Truths Debunked
- Recipe FAQs
- 📝 Recipe Card
Master the Iconic Pineapple Upside Down Cake
Have you ever wondered why we're so obsessed with flipping a cake over? It’s kind of a high stakes gamble, isn't it? I remember the first time I tried this. I was so nervous about the fruit sticking to the pan that I stared at the oven door for the entire 45 minutes.
But then, that moment happened. You put the plate on top, you take a deep breath, and you flip. The sound of the cake releasing from the pan is like a tiny kitchen victory.
This Pineapple Upside Down Cake is more than just a retro looker. It’s about the way the pineapple juice soaks into the top layer of the sponge while it bakes, creating a "fudgy" fruit layer that you just don't get with regular frosting.
We aren't just making a dessert here, we're making a piece of history that actually tastes better than the photos.
Expect a sponge that is dense enough to hold up the fruit but light enough to melt in your mouth. The edges of the pineapple rings get slightly chewy from the caramelized brown sugar, and the cherries add those little pops of bright sweetness.
It’s a total classic for a reason, and honestly, it’s one of the most reliable bakes in my repertoire.
Why Skillet Method Creates Perfect Caramel
Thermal Mass: The heavy cast iron retains and distributes heat evenly, ensuring the sugar melts into a smooth syrup without burning.
Bottom Up Browning: Heat coming from the bottom of the oven hits the skillet first, focusing the caramelization on the fruit before the cake finishes.
Acid Activation: The sour cream reacts with the baking powder to create tiny bubbles, leading to a velvety, tight crumb that absorbs juice.
The Moisture Barrier: Patting the pineapple rings dry prevents excess water from thinning out the toffee sauce during the bake.
| Method | Time | Texture | Best For |
|---|---|---|---|
| Cast Iron Skillet | 45 minutes | Crispy, deeply caramelized edges | Maximum flavor and crust |
| Cake Pan | 45 minutes | Soft, syrupy and delicate | A more traditional, soft cake feel |
| Individual Ramekins | 25 minutes | Entirely glazed surfaces | Dinner parties and easy serving |
The difference between using a skillet and a regular cake pan is mostly about the edges. In a skillet, the butter and sugar "fry" the edges of the cake batter, creating a crust that is almost like a lace cookie.
If you use a standard 9 inch cake pan, you'll get a beautiful result, but it will be softer and more uniform throughout.
Essential Numbers for Your Success
| Component | Science Role | Pro Secret |
|---|---|---|
| Light Brown Sugar | Adds moisture and molasses notes | Pack it tight to prevent air pockets in the glaze |
| Sour Cream | Tenderizes the gluten structure | Use full fat for the most velvety crumb possible |
| Pineapple Juice | Provides acidity and aroma | Reserve exactly 60ml from the can for the batter |
When we talk about the chemistry of this bake, it's all about the interaction between the fruit acids and the sugars. If you love experimenting with different textures in your bakes, you might find that this logic applies to other recipes too. For instance, the way we balance fats here is similar to how a Southern style pound cake relies on butter for structure.
The Alchemy of Selecting Components
For this Pineapple Upside Down Cake, we need ingredients that play well with heat. We aren't just mixing things together, we're building layers of flavor that will eventually be inverted.
- 60g unsalted butter, melted: Used for the glaze base. Why this? Provides the fat needed to turn sugar into toffee.
- 150g light brown sugar, packed: The foundation of the topping. Why this? Molasses content creates a deeper color than white sugar.
- 7 to 10 canned pineapple rings: The star of the show. Why this? Canned rings are consistent in thickness and sweetness.
- 10 maraschino cherries: For the classic look. Why this? They hold their color and shape perfectly during baking.
- 190g all purpose flour: The structural backbone. Why this? Provides enough strength to support the heavy fruit topping.
- 115g unsalted butter, room temperature: For the cake batter. Why this? Room temp butter creams better with sugar for aeration.
- 60ml full fat sour cream: The secret moisture weapon. Why this? Adds tang and keeps the crumb incredibly tender.
| Original Ingredient | Substitute | Why It Works |
|---|---|---|
| Light Brown Sugar | Dark Brown Sugar | More molasses for a darker, stickier toffee finish |
| Sour Cream | Greek Yogurt (full fat) | Similar acidity level, though slightly less rich |
| Maraschino Cherries | Fresh Raspberries | Adds a tart pop. Note: May bleed color into the cake |
If you find yourself enjoying the bright, fruity notes of the pineapple, you’ll probably love the way almond and fruit pair together in a Raspberry Almond Cake. It uses a similar logic of balancing tartness with a rich, buttery base.
Minimal Tools for Your Success
You really don't need a kitchen full of gadgets to make this Pineapple Upside Down Cake work. I’m a huge fan of the "less is more" approach, especially when it means fewer dishes at the end of the night.
The most important tool is your 9 inch cast iron skillet. If you don't have one, a heavy bottomed 9 inch cake pan works, but the skillet is the traditional way because it can go from stovetop to oven if you’re melting the butter directly in it.
You'll also need a couple of mixing bowls, a whisk, and a hand mixer (or a sturdy wooden spoon if you're feeling like a workout).
Chef's Tip: Freeze your butter for 10 minutes before creaming it if your kitchen is warm. This prevents the butter from melting too quickly, which ensures your cake stays fluffy rather than greasy.
An offset spatula is my second "must have." It makes leveling the batter over the pineapple rings so much easier without shifting the fruit around. If the fruit moves, your decorative pattern is ruined before you even start!
A Detailed Roadmap to Baking
- Preheat your oven to 350°F (175°C). Pour 60g of melted butter into a 9 inch cast iron skillet or heavy cake pan, swirling to coat the edges. Note: This coating prevents the cake sides from sticking.
- Sprinkle the 150g light brown sugar evenly over the butter. Use a fork to ensure there are no dry sugar patches until it resembles wet sand.
- Press the dried pineapple rings into the sugar bed in a decorative pattern. Place a maraschino cherry in the center of each ring. Note: Pressing them down helps them stay put when the batter is added.
- In a medium bowl, whisk together the 190g flour, 7g baking powder, and 2g sea salt.
- In a large bowl, cream the 115g of room temperature butter with the 200g granulated sugar until light and fluffy. Beat in the 2 eggs one at a time, followed by the 5ml vanilla extract.
- Whisk together the 60ml reserved pineapple juice and 60ml sour cream. Alternately add the dry ingredients and the sour cream mixture to the butter mixture, beginning and ending with the dry ingredients. Note: This prevents the batter from curdling.
- Carefully spread the batter over the fruit arrangement using an offset spatula until the top is level and the fruit is completely covered.
- Bake for 45 minutes until a toothpick inserted into the center comes out clean and the edges are pulling away from the pan.
- Cool in the pan for exactly 10 minutes. Note: This allows the caramel to set slightly so it doesn't run everywhere.
- Place a plate over the skillet and flip with a quick, confident motion until you hear the cake "thump" onto the plate.
Solving Every Potential Cake Problem
Why Your Cake Is Soggy
The most common culprit for a soggy Pineapple Upside Down Cake is the fruit itself. Pineapple is incredibly watery, and if you don't pat those rings dry with paper towels, that extra moisture turns your toffee into a thin, watery mess.
Also, make sure you're using the exact 60ml of juice for the batter any more will throw off the liquid to dry ratio.
| Problem | Root Cause | Solution |
|---|---|---|
| Fruit sticks to pan | Sugar didn't dissolve | Ensure sugar is fully moistened by butter before adding fruit |
| Cake sinks in middle | Underbaked or too much leavening | Check oven temp and ensure you bake for the full 45 minutes |
| Topping is too runny | Excess pineapple moisture | Pat fruit dry and let cake rest exactly 10 minutes before flipping |
The Common Mistakes Checklist
- ✓ Pat the pineapple rings completely dry with paper towels (prevents a soggy top)
- ✓ Ensure eggs and sour cream are at room temperature (prevents the batter from breaking)
- ✓ Don't skip the 10 minute rest after baking (it's the "sweet spot" for a clean flip)
- ✓ Use aConfidently flip the cake in one motion (hesitation leads to fruit sliding)
- ✓ Measure your flour by weight (190g) rather than volume to ensure the crumb isn't too dry
Swaps and Twists for Your Batch
If you want to change things up, this recipe is surprisingly flexible. For a Pineapple Upside Down Cake with Cake Mix, you can substitute the dry ingredients and the granulated sugar with one box of yellow cake mix.
You’ll still want to use the sour cream and pineapple juice instead of the water called for on the box to keep that high-quality, homemade texture.
Another popular variation is the Tropical Rum Twist. Add 15ml of dark rum to the butter and sugar mixture in the skillet before adding the fruit. It gives the caramel a complex, spicy note that pairs beautifully with the pineapple.
| Servings | Ingredient Adjustments | Pan Size | Cook Time |
|---|---|---|---|
| 5 people | Halve all ingredients (use 1 egg) | 6 inch skillet | 30-35 minutes |
| 10 people | Standard recipe | 9 inch skillet | 45 minutes |
| 20 people | Double all ingredients | Two 9 inch pans | 45-50 minutes |
If you are scaling the recipe down, remember that the "flip" is actually easier with a smaller pan! Just be careful not to over mix the batter, as smaller batches are more sensitive to gluten development.
Saving and Reviving Your Sweet Leftovers
Storage is easy, but you have to be careful with the fruit. Because the topping is essentially a syrup, it can get a bit "weepy" if left at room temperature for too long.
- Fridge: Keep the cake in an airtight container for up to 3 days. The cold will firm up the butter, so I recommend letting a slice sit out for 20 minutes before eating.
- Freezer: You can freeze individual slices for up to 2 months. Wrap them tightly in plastic wrap and then foil. Thaw in the fridge overnight.
- Zero Waste: If you have leftover pineapple rings, chop them up and simmer them with a little extra brown sugar to make a quick jam for your morning toast. You can also use the leftover cherry juice to flavor a simple glaze for cookies.
The Best Ways to Plate and Enjoy
When you're ready to serve your Pineapple Upside Down Cake, timing is everything. It’s best served warm, shortly after that magical flip. The caramel is still gooey, and the cake is at its most tender.
I love serving a thick slice with a dollop of unsweetened whipped cream. The cream cuts through the intense sweetness of the toffee topping perfectly. If you want to go full "diner style," a scoop of high-quality vanilla bean ice cream is the way to go.
The way the ice cream melts into the warm pineapple rings is honestly life changing.
Precision Checkpoints
- Caramel Foundation: 150g sugar must be fully saturated with 60g butter.
- Internal Temperature: The cake is done when the center reaches 210°F (99°C).
- The Flip Window: Exactly 10 minutes of cooling; any longer and the sugar hardens, any shorter and the cake falls apart.
3 Bullet Decision Shortcut
- If you want a crunchier edge, use a cast iron skillet and don't skimp on the 60g of butter in the base.
- If you want a softer, lighter cake, replace the sour cream with whole milk (but note the crumb will be less velvety).
- If you want a deeper flavor, swap the light brown sugar for dark brown sugar to get more molasses impact.
Kitchen Truths Debunked
Many people think you have to cook the pineapple in the butter and sugar on the stovetop first. This is a myth. The 45 minutes in the oven is more than enough time for the pineapple to soften and the sugar to turn into a rich caramel. Pre cooking often leads to mushy fruit.
Another common misconception is that you need a special "upside down cake pan." You don't! Any heavy 9 inch pan will do. The "specialty" is all in the technique of layering and flipping, not in a fancy piece of metal.
Finally, don't believe the lie that you can't use fresh pineapple. You can, but you have to slice it very thin and consistent. Canned rings are just the "cheat code" for a perfect, even look every single time. Honestly, most people prefer the nostalgia of the canned rings anyway!

Recipe FAQs
What cake mix do you use for pineapple upside down cake?
This recipe is made from scratch. By using 190g of all-purpose flour, baking powder, and sea salt, you achieve a structure that supports the fruit better than standard boxed mixes.
Do you flip a pineapple upside down cake when it's hot or cold?
Flip it after exactly 10 minutes of cooling. If you flip it while boiling hot, the structural integrity of the crumb is too weak; if you wait until it is cold, the caramelized sugar topping will solidify and stick to the pan.
Is the 1234 rule in baking used for this recipe?
No, this is a common misconception. While the 1234 rule uses equal parts of butter, sugar, eggs, and flour, this recipe utilizes specific ratios of sour cream and reserved pineapple juice to create a moist, tangy crumb that handles the fruit weight differently.
Can you add pineapple to a box cake mix?
Yes, but the results vary. Simply folding fruit into a standard mix often leads to a soggy layer at the bottom, so ensure you pat your pineapple rings completely dry before placing them on the sugar base.
How to ensure the pineapple rings don't stick to the skillet?
Whisk the brown sugar and melted butter until it resembles wet sand. This create a stable, caramelized barrier that acts as a release agent when you invert the cake after the 45-minute bake time. If you enjoy achieving perfect caramelization here, apply similar patience to the baking and cooling precision required for cheesecakes.
Why is my pineapple upside down cake raw in the middle?
Use a toothpick to verify doneness. Since ovens vary, insert a toothpick into the center after 45 minutes; if it comes out with wet batter, continue baking in 3-minute increments until it emerges clean.
How to keep the cake moist after baking?
Store it in an airtight container at room temperature. The combination of full fat sour cream and pineapple juice provides enough moisture to keep the crumb velvety for up to two days without needing refrigeration.
Pineapple Upside Down Cake
Ingredients:
Instructions:
Nutrition Facts:
| Calories | 375 kcal |
|---|---|
| Protein | 3.5 g |
| Fat | 16.5 g |
| Carbs | 54.8 g |
| Fiber | 0.8 g |
| Sugar | 41.2 g |
| Sodium | 122 mg |
