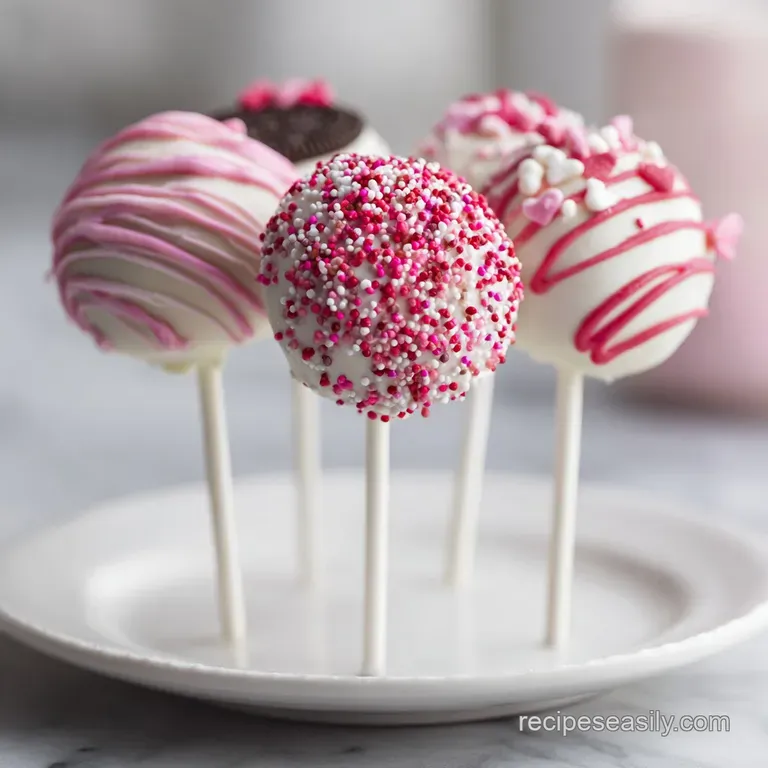
Valentines Day Oreo Pops Recipe: No Bake Sweet
- Time: Active 15 minutes, Passive 20 minutes, Total 35 minutes
- Flavor/Texture Hook: Crunchy chocolate cookie core encased in a silky smooth, snap action candy coating
- Perfect for: School classroom treats, Galentine's dessert boards, or beginner friendly holiday gifting
- Master the Ultimate Valentines Day Oreo Pops Recipe
- The Secret Chemistry of the Perfect Chocolate Snap
- Component Analysis and Selection
- Essential Tools for Professional Results
- Step by Step Guide to Dipping and Decorating Success
- Preventing Common Mistakes for a Perfectly Smooth Finish
- Special Diets and Creative Twists for Everyone to Enjoy
- How to Keep Your Treats Fresh and Snap Ready
- Beautiful Ways to Present Your Valentine Cookie Creations
- Recipe FAQs
- 📝 Recipe Card
Master the Ultimate Valentines Day Oreo Pops Recipe
The first time I tried making these, it was a total disaster. I thought I could just jam a stick into an Oreo and call it a day. Naturally, the cookie split into three pieces, the cream filling stayed on one side, and I ended up eating a pile of broken crumbs over the sink.
But there's something so satisfying about the "click" sound of a lollipop stick finally locking into that white cream center once you know the secret. When you get it right, the aroma of that sweet, melting red candy coating fills the kitchen, and you know you're about to make something special.
We've all been there, trying to make a "Pinterest perfect" treat only to have it slide right off the stick and into a bowl of melted chocolate. Trust me, I've made every mistake in the book so you don't have to.
We're going to use a specific technique that acts like "edible glue" to make sure these pops are sturdy enough to survive a party. You’ll love how the vibrant red shell provides a clean, professional snap that contrasts perfectly with the soft, cocoa rich interior of the Double Stuf Oreo.
This recipe is about more than just sugar; it's about that feeling of handing someone a handmade treat that actually looks like it came from a boutique bakery. Whether you’re making these for your kids' classmates or a cozy night in with your best friends, the process is surprisingly meditative once you find your rhythm.
Let's get into the details so your kitchen stays clean and your treats stay beautiful.
The Secret Chemistry of the Perfect Chocolate Snap
To get that professional finish on your Valentines Day Oreo Pops Recipe, we have to look at the physics of how fats and sugars interact during the cooling process.
- Lubrication Dynamics: The refined coconut oil breaks down the viscosity of the candy melts, allowing for a thinner, more even coating that won't crack when you bite it.
- Thermal Stability: Using Double Stuf Oreos provides a higher "cream to wafer" ratio, which acts as a thermal insulator for the stick, keeping it anchored as the chocolate sets.
- Capillary Action: Dipping the stick into melted chocolate before inserting it into the cream creates a structural bond that fuses the two halves of the cookie together.
- Crystal Alignment: Flash chilling the pops in the freezer for exactly 10 minutes ensures the sugars in the candy melts set rapidly, preventing the "drip streaks" often seen in room temperature setting.
| Setting Method | Time Required | Surface Texture | Risk Level |
|---|---|---|---|
| Room Temp | 45 minutes | Dull, matte finish | High (sticks may slide) |
| Refrigerator | 20 minutes | Semi glossy | Low (occasional condensation) |
| Freezer | 10 minutes | High shine, crisp snap | Minimal (perfect for dipping) |
When you are deciding which method to use, the freezer is almost always your best friend for this specific project. It creates a temperature differential that forces the warm candy coating to seize instantly upon contact, which is exactly how you get those smooth, rounded edges.
If you find yourself running low on time, the freezer method isn't just a shortcut; it's actually the superior way to ensure the coating doesn't pull the cookie apart.
Component Analysis and Selection
| Ingredient | Science Role | Pro Secret |
|---|---|---|
| Double Stuf Oreos | Structural Base | Use Double Stuf specifically; the extra cream is non negotiable for holding the lollipop stick without the cookie cracking. |
| Candy Melts | Encapsulation | These contain vegetable oil and sugar designed to melt and re harden quickly without the need for tempering real chocolate. |
| Refined Coconut Oil | Viscosity Modifier | This is the key to a "velvety" flow. It thins the coating so it drapes over the cookie instead of clumping. |
| White Chocolate | Decorative Contrast | High cocoa butter content ensures the drizzle stays bright white against the red background. |
While you're gathering your supplies, remember that the quality of your candy melts matters. Some cheaper brands can be grainy, so look for a bag that feels smooth to the touch even through the plastic. If you're feeling adventurous after mastering these, you might want to try my Valentine Monster Cookies recipe which uses a similar color palette but offers a totally different chewy texture.
Essential Tools for Professional Results
You don't need a high tech kitchen to pull this off, but a few specific items will make your life significantly easier. First, grab a tall, narrow microwave safe glass or a "dipping cup." The taller and narrower the vessel, the less coating you'll need to fully submerge the cookie.
If you use a wide bowl, you'll be struggling to coat the sides and end up with a messy, uneven finish.
A Styrofoam block or a heavy cardboard box with small holes poked in it is also a lifesaver. You need a place for these pops to stand upright while they dry. If you lay them flat on parchment paper, you'll get a "flat back" on your pops, which isn't the end of the world, but it loses that 3D "pop" appeal.
I personally use a simple block of florist foam covered in plastic wrap it’s sturdy and reusable.
Chef's Tip: Before you start, place your lollipop sticks in the freezer for 5 minutes. A cold stick helps the melted chocolate "anchor" set almost instantly when you insert it into the cookie.
step-by-step Guide to Dipping and Decorating Success
- Prep the cookies. Gently twist the 12 Double Stuf Oreo cookies to separate the two chocolate wafers, making sure the cream stays entirely on one side. Note: If the cream splits, just scrape it back onto one side with a butter knife.
- Melt the "glue." Place 2 oz of the red candy melts in a small bowl and microwave in 30 second bursts until smooth and glossy.
- Insert the sticks. Dip the tip of one 6 inch lollipop stick into the melted red candy, then press it firmly into the center of the cream side wafer.
- Reassemble the Oreo. Place the plain wafer back on top of the cream and stick, pressing gently until you feel the "glue" spread.
- The Flash Chill. Lay the assembled pops on a tray and freeze for 10 minutes until the center is rock solid.
- Thin the coating. Melt the remaining 10 oz of red candy melts with 1 tsp refined coconut oil in a tall glass until it flows like warm honey.
- The Vertical Dip. Hold the stick and plunge the cold cookie straight down into the red coating until the chocolate meets the stick.
- The Drip and Spin. Lift the pop out and gently tap your wrist not the stick to shake off excess, then spin it slowly until the surface is perfectly level.
- Add the sparkle. While the coating is still wet, sprinkle 2 tbsp Valentine themed sprinkles over the top and sides.
- The Final Drizzle. Melt the 2 oz white chocolate, snip a tiny corner off a sandwich bag, and zig zag it across the set pops until they look like artisan truffles.
Preventing Common Mistakes for a Perfectly Smooth Finish
The biggest hurdle with this recipe is usually the coating "seizing" or becoming thick and chunky. This usually happens if a single drop of water gets into your bowl or if you overheat the candy melts. If your chocolate looks like wet sand, it’s unfortunately seized.
You can sometimes save it by adding a teaspoon more of coconut oil and stirring vigorously, but prevention is much easier.
Why Your Cookie Coating Is Streaky
If you see streaks, it's usually because the candy melts weren't stirred enough or the temperature of the room is too cold. The fat is separating before it can set. To fix this, ensure you stir the melted mixture for at least a full minute after it comes out of the microwave to fully emulsify the coconut oil.
| Problem | Root Cause | Solution |
|---|---|---|
| Cracked Shell | Cookie was too cold | Let frozen pops sit at room temp for 2 mins before dipping. |
| Stick Slips Out | Not enough "glue" | Ensure the stick tip is fully submerged in chocolate before inserting. |
| Bubbles in Finish | Excessive whisking | Tap the glass on the counter to let air bubbles rise to the top. |
Another common issue is the "leaking" cream. If the Oreos aren't fully sealed by the coating, the cream can expand slightly and poke through. Make sure your dip goes slightly up the stick to create a 360 degree seal. For those who love this flavor profile but want something a bit more decadent, you might enjoy my Chocolate Valentine Tarts recipe which offers a similar visual pop but with a rich ganache filling.
Common Mistakes Checklist
- ✓ Never use a wet spoon to stir your chocolate; even one drop of water causes seizing.
- ✓ Don't skip the "Flash Chill" step; a warm cookie will slide right off the stick.
- ✓ Tap your wrist, not the stick, to remove excess coating to prevent the stick from snapping.
- ✓ Wait 30 seconds after dipping before adding sprinkles so they don't slide off.
- ✓ Use a deep vessel for dipping to avoid having to "paint" the chocolate on.
Special Diets and Creative Twists for Everyone to Enjoy
If you're dealing with allergies, you can easily swap the cookies for a gluten-free chocolate sandwich cookie. Most gluten-free brands are slightly crunchier and have less cream, so you may need to add a small dollop of frosting inside to help hold the stick.
For a vegan version, use dairy-free chocolate chips and a bit of beet powder mixed with coconut oil for a natural red tint instead of traditional candy melts.
Scaling this recipe is quite simple, though there are a few rules to follow. If you are doubling the batch for a big party (24 pops), don't melt all the chocolate at once. It will start to cool and thicken before you get to the last ten cookies.
Work in batches of 12 to keep the coating at the optimal dipping temperature.
- To Scale Down (6 pops): Use half the ingredients and a much smaller, thinner juice glass for dipping so the chocolate level stays high.
- To Scale Up (24+ pops): Increase the coconut oil by 10% to keep the chocolate fluid longer. Work in a warm kitchen to prevent premature setting.
How to Keep Your Treats Fresh and Snap Ready
The beauty of these pops is that they are incredibly shelf stable. You can keep them at room temperature in a cool, dry place for up to 5 days. However, if your house is warm, the chocolate might soften.
In that case, the fridge is fine, but be warned: when you take them out, they might "sweat" (develop condensation), which can make the sprinkles bleed color.
For long term storage, you can freeze these for up to 2 months. Place them in a single layer in an airtight container with parchment paper between them. When you're ready to eat, move them to the fridge for 24 hours, then to the counter.
This slow thaw prevents the chocolate shell from cracking due to rapid temperature changes.
Zero Waste Tip: Don't throw away the leftover melted candy! Spread it out on a piece of parchment paper, top it with any leftover crushed Oreo crumbs or sprinkles, and let it set. You've just made "Valentine's Bark" that you can break into pieces for a snack.
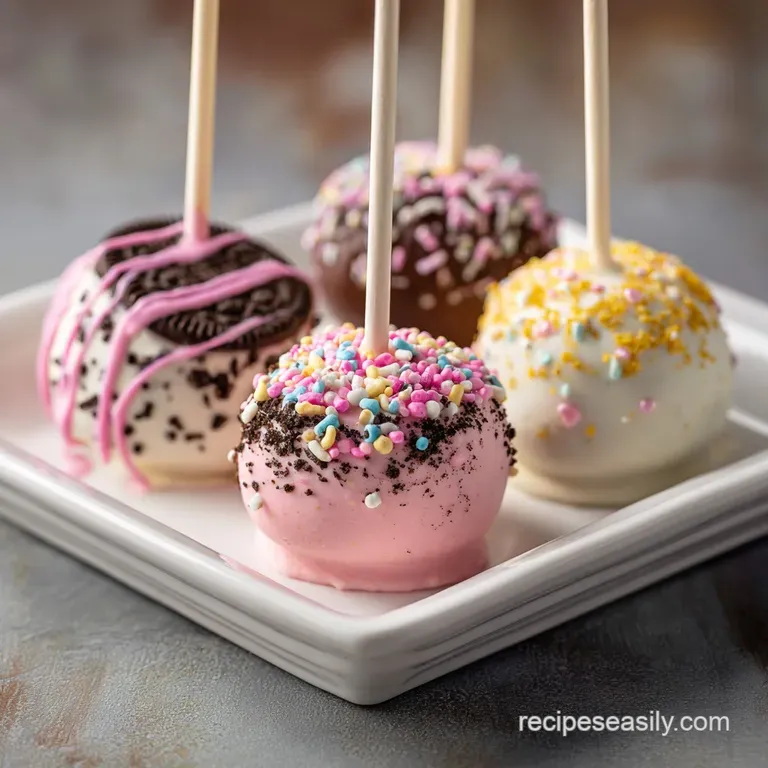
Beautiful Ways to Present Your Valentine Cookie Creations
Presentation is half the fun with this Valentines Day Oreo Pops Recipe. For a classic look, I love wrapping each pop in a small cellophane bag tied with a piece of red baker's twine or a silk ribbon. It makes them feel like a gift from a high end candy shop.
If you're serving them at a party, standing them up in a glass jar filled with red sugar pearls or white jelly beans creates a stunning "bouquet" effect.
You can also get creative with the "white chocolate drizzle" technique. Instead of just lines, try doing small dots or even writing initials if you have a steady hand. If you want to expand your dessert table, these look amazing next to some Valentine Monster Cookies recipe to give your guests a variety of textures.
Debunking Kitchen Myths
- Myth: You must use a double boiler for candy melts. Truth: The microwave is actually safer and faster as long as you use low power and short bursts. Double boilers carry the risk of steam (water) getting into the chocolate.
- Myth: Refrigerator cooling is better than freezer cooling. Truth: The freezer provides a "thermal shock" that results in a much shinier, snappier finish for candy coated items.
- Myth: Any cookie will work. Truth: Thin Oreos or standard Oreos often lack the structural integrity to hold a stick; Double Stuf is the gold standard for a reason.

Recipe FAQs
Can I substitute regular Oreos instead of Double Stuf for these pops?
No, sticking to Double Stuf is crucial for stability. Regular Oreos have less cream filling, which is necessary to act as the "edible glue" holding the lollipop stick securely in place.
How to prevent the melted candy coating from becoming thick and grainy during dipping?
Melt at 50% power in 20-second intervals, stirring thoroughly between each. Overheating or introducing even a single drop of water causes the coating's fats and solids to seize instantly.
How do I ensure the lollipop stick anchors properly without splitting the cookie?
Dip the tip of the stick into a small amount of melted candy coating first. This creates a chocolate "anchor" that fuses the cookie halves together when you press the stick into the cream center.
Is it necessary to freeze the assembled pops before dipping them in chocolate?
Yes, this step is non-negotiable for a professional finish. Freezing the cookie ensures the cold temperature causes the warm coating to set instantly, preventing drips and ensuring a crisp shell.
How to thin the melted candy coating to achieve a smooth, even drape over the cookie?
Stir in 1 teaspoon of refined coconut oil per 10 ounces of candy melts. This modifies the viscosity, allowing the coating to flow thinly and evenly, which is the same principle we use to control liquid consistency in our Marry Me Butter recipe.
What is the best method for storing finished Oreo pops to maintain their snap?
Store them at cool room temperature for up to 5 days in an airtight container. If your kitchen is warm, you can refrigerate them, but allow them to warm slightly before serving to prevent the shell from cracking upon biting.
Can I use regular melted white chocolate instead of candy melts for decoration?
No, you should avoid using standard white chocolate for the main coating. Candy melts contain vegetable oils that set hard and shiny quickly without tempering; real chocolate requires tempering, which is complicated for this application.
Valentines Oreo Pops Recipe

Ingredients:
Instructions:
Nutrition Facts:
| Calories | 257 kcal |
|---|---|
| Protein | 0.8 g |
| Fat | 13.9 g |
| Carbs | 32.8 g |
| Fiber | 1 g |
| Sugar | 32.4 g |
| Sodium | 92 mg |
