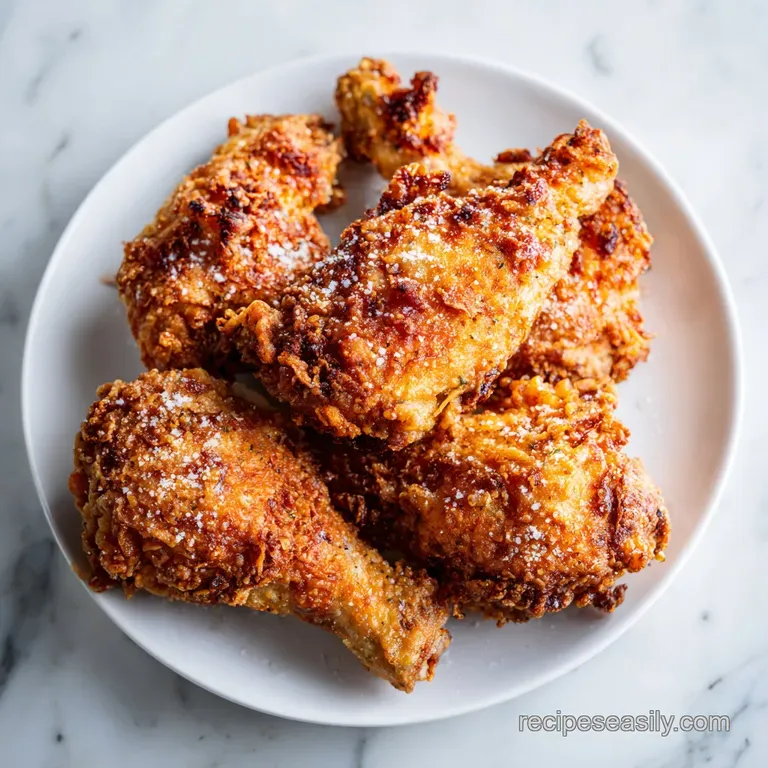
Shattering-Crisp Oven Fried Chicken
- Time: Active 20 minutes, Passive 35 minutes, Total 55 minutes
- Flavor/Texture Hook: Shatter crisp golden crust with a tender, juicy interior
- Perfect for: Stress free weeknight dinners or a healthier comfort food fix
- The Secret to Extra Crispy Oven Fried Chicken
- The Logic of the Double Coating
- Official Preparation and Cook Times
- Ingredients for a Gold Standard
- Essential Tools for Crispy Success
- Step by Step Cooking Flow
- Fixing Common Texture Problems
- Flavor Variations and Ingredient Swaps
- Keeping Leftovers Crunchy and Fresh
- Perfect Sides for This Meal
- Recipe FAQs
- 📝 Recipe Card
The Secret to Extra Crispy Oven Fried Chicken
The first time I pulled a tray of this Oven Fried Chicken out of the oven, the sound was what hit me first. As the chicken sat on its wire rack, I could hear the tiny, frantic bubbles of fat sizzling against the toasted panko.
It wasn't that heavy, oily smell you get from a deep fryer, but something much more aromatic: a mix of nutty toasted bread, smoked paprika, and that sharp hit of garlic powder. When I finally took a bite, the coating didn't just crumble, it literally shattered, revealing meat that was steaming and incredibly juicy.
I used to think that "oven fried" was just a polite way of saying "baked chicken that's trying its best but failing." I'd tried the cornflake thing, the Ritz cracker thing, and the "just spray it with oil" thing. Most of the time, the bottom ended up as a soggy, gummy mess while the top was barely pale gold.
But then I realized the secret isn't just the heat, it's the prep work. By toasting the crumbs beforehand and lifting the meat off the pan, we bypass the steam trap that ruins most home recipes.
You're going to love how the cayenne and black pepper give just enough of a back of-the throat tickle without being overwhelming.
This isn't just another chicken dinner; it's the result of me making every mistake possible so you don't have to. We're talking about a coating that actually stays attached to the bird and a skin on finish that feels indulgent but doesn't leave you feeling weighed down.
Whether you’re feeding a crowd of picky kids or looking for a solid meal prep protein, this method is my absolute go to. Let's get into the specifics of why this actually works.
The Logic of the Double Coating
Utilizing High Heat for Maillard
Most people bake chicken at 350°F (180°C), but for that authentic fried texture, we need to push it to 400°F (200°C).
This higher temperature ensures the fat in the skin renders out quickly, which actually fries the panko from the inside out while the oven air crisps it from the outside in.
Pre Toasting Panko for Maximum Crunch
Panko is physically incapable of turning deep golden brown in the time it takes chicken to cook without burning the meat. By toasting the breadcrumbs in a little butter before they ever touch the chicken, we "lock in" the color and a base level of crunch that the oven merely finishes off.
Elevating Poultry for Better Airflow
The biggest mistake in home cooking is placing meat directly on a flat baking sheet. This creates a pool of moisture that turns the bottom of your Oven Fried Chicken into a wet sponge. A wire rack allows the hot air to circulate 360 degrees, drying out the coating on all sides simultaneously.
| Method | Finish Time | Surface Texture | Internal Juiciness |
|---|---|---|---|
| Direct Pan Bake | 45 minutes | Soft/Soggy Bottom | Moderate |
| High Heat Rack | 35 minutes | Uniformly Shatter Crisp | Very High |
| Low Heat Bake | 60 minutes | Leathery/Dry | Low |
The buttermilk brine is the real hero here. It isn't just for flavor; the lactic acid in the buttermilk works to break down the tough protein fibers in the chicken. This creates a much more tender bite while the salt in the brine helps the meat retain its moisture even under the high 400°F (200°C) heat of the oven.
| Ingredient | Science Role | Pro Secret |
|---|---|---|
| Buttermilk | Acidic Tenderizer | Submerge for at least 30 minutes to ensure the acid penetrates the meat fibers. |
| Panko Crumbs | Structural Crunch | These have more surface area than regular crumbs, which creates more "points" for the heat to hit. |
| Smoked Paprika | Color and Umami | It provides a deep red hue that mimics the look of traditionally deep fried flour. |
| Melted Butter | Fat Transfer | Butter carries the heat from the oven into the panko, acting as a mini "fryer" on each crumb. |
While we are focusing on the oven today, if you ever want to compare this to other methods, you should check out my air fryer chicken thighs to see how that convection heat changes the crust. It's a fun experiment for a weekend when you have time to play around with textures.
Official Preparation and Cook Times
When I talk about "55 minutes total," I mean it. This is a very predictable recipe once you get the rhythm down. The hands on part is mostly the dredging station, which can feel a bit messy but is actually quite therapeutic once you get a "wet hand, dry hand" system going.
If you're organized, you can have the kitchen cleaned up before the timer even goes off.
- Prep Time:20 minutes (includes dredging and toasting)
- Brining Time:30 minutes (minimum passive time)
- Cook Time:35 minutes
- Total Time:55 minutes (active cooking + prep)
- Yield: 4 servings
The 400°F (200°C) oven temperature is non negotiable. If you go lower, the panko won't get that satisfying "snap" and the chicken skin won't render its fat.
If you go higher, you risk scorching the spices like the cayenne and garlic powder before the meat hits that safe 165°F (74°C) internal mark.
Ingredients for a Gold Standard
For this recipe, we are using 2 lbs (approx 900g) of bone in, skin on chicken. You can use legs or thighs, but I personally love a mix. The bone keeps the meat moist, and the skin provides the fat needed to make the panko truly "fry."
- 2 lbs bone in, skin on chicken legs or thighs:Why this? The skin renders fat that fries the coating from beneath.
- 1 cup buttermilk:Why this? Lactic acid tenderizes while acting as the perfect glue for the flour.
- 1 tsp smoked paprika:Why this? Adds a "charred" depth and a rich, golden brown color.
- 1 tsp garlic powder:Why this? Distributes flavor more evenly than fresh garlic in a over high heat bake.
- 0.5 tsp kosher salt:Why this? Enhances the natural savory notes of the poultry.
- 2 cups panko breadcrumbs:Why this? Larger shards create a more dramatic, crunchy texture than fine crumbs.
- 0.5 cup all purpose flour:Why this? Creates a "primer" coat that helps the buttermilk and panko stick.
- 2 tbsp melted butter:Why this? Saturates the panko so it browns evenly in the dry oven air.
- 1 tsp onion powder:Why this? Adds a subtle sweetness and aromatic base to the crust.
- 0.5 tsp cayenne pepper:Why this? Provides a gentle heat that cuts through the richness of the fat.
- 0.5 tsp black pepper:Why this? Adds a sharp, pungent bite to contrast the smoky paprika.
| Original Ingredient | Substitute | Why It Works |
|---|---|---|
| Buttermilk (1 cup) | Greek Yogurt (0.5 cup) + Milk (0.5 cup) | Provides similar acidity and thickness for dredging. |
| Panko Breadcrumbs | Crushed Cornflakes | Very crispy. Note: Lacks the light, airy texture of panko but is very crunchy. |
| Smoked Paprika | Chili Powder | Adds heat and color. Note: Will be less smoky and more earthy. |
Essential Tools for Crispy Success
You don't need a deep fryer, but you do need a couple of specific items to ensure your Oven Fried Chicken doesn't end up looking like a regular roasted bird. The most important piece of equipment is a rimmed baking sheet. This catches any drips and prevents your oven from smoking.
Inside that baking sheet, you absolutely must place an oven safe wire cooling rack. This is the game changer. By elevating the chicken, you're allowing the hot air to hit the bottom of the piece, drying out the panko and rendering the skin.
Without this, the bottom will be sitting in a pool of chicken juice and buttermilk, which is the fast track to a soggy dinner.
I also recommend using three wide, shallow bowls for your dredging station. Using deep bowls makes it harder to get a flat, even coating on larger pieces of chicken. A pair of tongs is also helpful to keep your hands from becoming "club hands" (where the flour and buttermilk create a thick paste on your fingers), though I usually just embrace the mess and use my hands.
Finally, an instant read meat thermometer is the only way to be 100% sure the chicken is safe to eat without cutting into it and losing all those precious juices.
step-by-step Cooking Flow
Brining for Maximum Tenderness
- In a large bowl, whisk together the 1 cup buttermilk, 1 tsp smoked paprika, 1 tsp garlic powder, and 0.5 tsp kosher salt.
- Submerge the 2 lbs of chicken pieces in the buttermilk mixture. Ensure every piece is fully coated.
- Cover and refrigerate for at least 30 minutes. Note: This allows the acid to start tenderizing the meat.
Toasting the Panko Coating
- Preheat your oven to 400°F (200°C).
- Spread the 2 cups of panko breadcrumbs on a baking sheet and toast for 3-5 minutes until they are a light, pale gold.
- Transfer the toasted crumbs to a shallow bowl and toss with the 2 tbsp melted butter, 1 tsp onion powder, 0.5 tsp cayenne pepper, and 0.5 tsp black pepper.
Dredging with Precision
- Set up your station: one bowl with 0.5 cup all purpose flour, one with the buttermilk soaked chicken, and one with the seasoned panko.
- Lift a piece of chicken from the buttermilk, let the excess drip off, and dredge it lightly in the flour. The flour should be a thin, dusty coat.
- Dip the floured chicken back into the buttermilk briefly, then press it firmly into the panko mixture. Use your palms to push the crumbs into the meat.
Mastering the High Heat Bake
- Place the oven safe wire rack over a rimmed baking sheet.
- Arrange the chicken pieces on the rack, ensuring they aren't touching. Space is key for airflow.
- Bake for 30–35 minutes until the crust is deep golden and the internal temperature reaches 165°F (74°C).
Fixing Common Texture Problems
Why Your Coating Is Soggy
The most common culprit for a limp crust is a lack of airflow. If you aren't using a wire rack, the chicken is essentially steaming in its own juices. Another reason could be the oven temperature; if your oven runs cool, the fat won't render fast enough to crisp the breadcrumbs.
Always check your oven with a secondary thermometer if you suspect it's not hitting 400°F (200°C).
Preventing the Coating Falling Off
If your breading slides off like a loose sweater, it’s usually because the chicken was too wet when it hit the flour, or you skipped the flour "primer" step. The flour creates a dry surface for the buttermilk to cling to, and the buttermilk acts as the glue for the panko.
Also, make sure you really press the panko into the meat. Don't be gentle; you want those crumbs embedded in the buttermilk layer.
| Problem | Root Cause | Solution |
|---|---|---|
| Pale Crust | Didn't pre toast panko | Toast panko with butter for 3-5 mins before dredging. |
| Dry Meat | Overcooked past 165°F | Use a thermometer; pull chicken immediately at 165°F (74°C). |
| Blanding Flavor | Not enough seasoning in panko | Double the smoked paprika or black pepper in the crumb mix. |
Common Mistakes Checklist
- ✓ Don't skip the pre toasting of the panko; it's the only way to get a deep golden color in 35 minutes.
- ✓ Ensure the chicken pieces do not touch each other on the rack to allow for 360 degree airflow.
- ✓ Use bone in, skin on chicken for the best flavor; boneless breasts will dry out much faster at this heat.
- ✓ Let the chicken rest for 5 minutes after baking so the juices redistribute before you bite in.
- ✓ Avoid using "low-fat" buttermilk; the fat content helps the panko adhere and adds flavor.
For those who want a similar crunch but have even less time, my crispy baked chicken thighs use a slightly different technique that's great for beginners.
Flavor Variations and Ingredient Swaps
If you're looking for a Healthy Oven Fried Chicken, you can actually swap the panko for crushed nuts like pecans or almonds. This significantly lowers the carb count while still providing a satisfying crunch.
Just be careful, as nuts have a higher fat content and can burn faster than breadcrumbs, so you might need to tent the chicken with foil halfway through the bake.
Spicy Nashville Heat Swap
To give this a Southern kick, add 1 tablespoon of cayenne pepper to the melted butter that you toss with the panko. After the chicken is done, you can even whisk a little extra cayenne and brown sugar into the leftover melted butter and brush it over the finished bird.
It’s an intense, fiery experience that pairs perfectly with white bread and pickles.
Adapting for Spicy Chicken Wings
You can easily use this exact method for Oven Fried Chicken Wings. Since wings are smaller, you'll want to reduce the baking time to about 20-25 minutes. Because wings have a higher skin to meat ratio, they end up being incredibly crispy.
They are perfect for game day when you want the "fried" feel without the heavy grease of a traditional wing.
For a completely different vibe, you might want to look at my easy french garlic chicken, which uses a one pot method if you're not in the mood for the multi step dredging station today.
Keeping Leftovers Crunchy and Fresh
If you have leftovers, don't even think about the microwave. Microwaves work by heating water molecules, which will turn your beautiful crispy panko into a damp, sad mess in seconds. Instead, store your leftovers in a glass container with a loose lid in the fridge for up to 3 days.
To reheat, place the chicken back on a wire rack over a baking sheet. Put it in a 350°F (180°C) oven for about 10-12 minutes. This dries out any moisture that accumulated in the fridge and brings that "fryer" snap back to the crust.
If you're in a rush, an air fryer at 360°F for 4-5 minutes also works wonders for reviving the texture.
For Zero Waste, don't throw away the bones! Even though the chicken was "fried," the bones are still full of flavor. You can toss them into a pot with some veggie scraps (onion skins, carrot ends, celery tops) and water to make a quick, smoky chicken stock.
The smoked paprika and garlic from the coating will add a unique depth to the broth that is incredible for a base in lentil soup or a spicy ramen.
Perfect Sides for This Meal
This Oven Fried Chicken is a star, but it needs the right supporting cast. I love serving it with something acidic to cut through the richness. A cold, vinegar based coleslaw or a bright cucumber salad works beautifully. The crunch of the vegetables mirrors the crunch of the chicken, making every bite interesting.
The Classic Comfort Pairing
You can't go wrong with mashed potatoes and a quick gravy. Since we aren't deep frying, we don't have pan drippings to make a traditional gravy, but a simple butter and flour roux with some chicken stock and a heavy hit of black pepper does the trick. It turns this into a "Sunday Dinner" feel any night of the week.
The Modern Fried Chicken Salad
If you have leftovers, slice the cold chicken and lay it over a bed of mixed greens with sliced apples, toasted walnuts, and a honey mustard dressing. The contrast between the cold, crisp greens and the salty, seasoned panko coating is fantastic.
It's a great way to use up those last few pieces while keeping the meal feeling fresh.
Many people believe that searing meat "seals in the juices," but that is actually a myth. Moisture loss happens regardless of a crust; the real reason we want that crust is for flavor development and texture contrast. Similarly, you don't need to flip the chicken halfway through if you use a wire rack.
The air circulates underneath, so flipping actually risks knocking off some of that precious panko. Trust the rack!

Recipe FAQs
How do you fry chicken in the oven?
Use a wire cooling rack over a rimmed baking sheet to mimic deep frying. This allows hot air to circulate 360 degrees around the chicken, ensuring the bottom stays crispy while the meat cooks evenly.
Can a diabetic eat baked chicken?
Yes, this recipe is a suitable option for many diabetic meal plans. Since it avoids the heavy oils and deep frying processes of traditional versions, it significantly reduces the overall fat content while keeping protein levels high.
How to get chicken in the oven crispy?
Toast your panko breadcrumbs for 3-5 minutes on a baking sheet before coating the chicken. This ensures a deep, golden crunch within the 35-minute cook time, as the crumbs are already browned before they hit the oven.
How long does fried chicken go in the oven?
Bake the chicken for exactly 30 35 minutes. It is crucial not to flip the pieces during this time to keep the crust intact, and you should always verify the internal temperature reaches 165°F.
Is it true that I need to flip the chicken halfway through for even browning?
No, this is a common misconception. Because you are using an elevated wire rack, the heat circulates naturally around the entire piece, eliminating the need to flip and risk losing your crispy breading.
How to prevent the breading from falling off during baking?
Press the panko mixture firmly onto the chicken after the buttermilk and flour dip. This ensures a secure bond, similar to how we layer flavors in our meal prep chicken stacks, creating a stable crust that won't slide off in the oven.
Why is resting the chicken after baking important?
Rest the chicken for 5 minutes to allow the juices to redistribute throughout the meat. Cutting into the chicken too early will cause the moisture to escape, resulting in a dry texture despite your careful prep work.
Crispy Oven Fried Chicken

Ingredients:
Instructions:
Nutrition Facts:
| Calories | 582 kcal |
|---|---|
| Protein | 41.5 g |
| Fat | 31.2 g |
| Carbs | 33.6 g |
| Fiber | 1.8 g |
| Sugar | 3.2 g |
| Sodium | 795 mg |
