Chicken Gravy: Silky and Savory

- Time: Active 2 minutes, Passive 8 minutes, Total 10 minutes
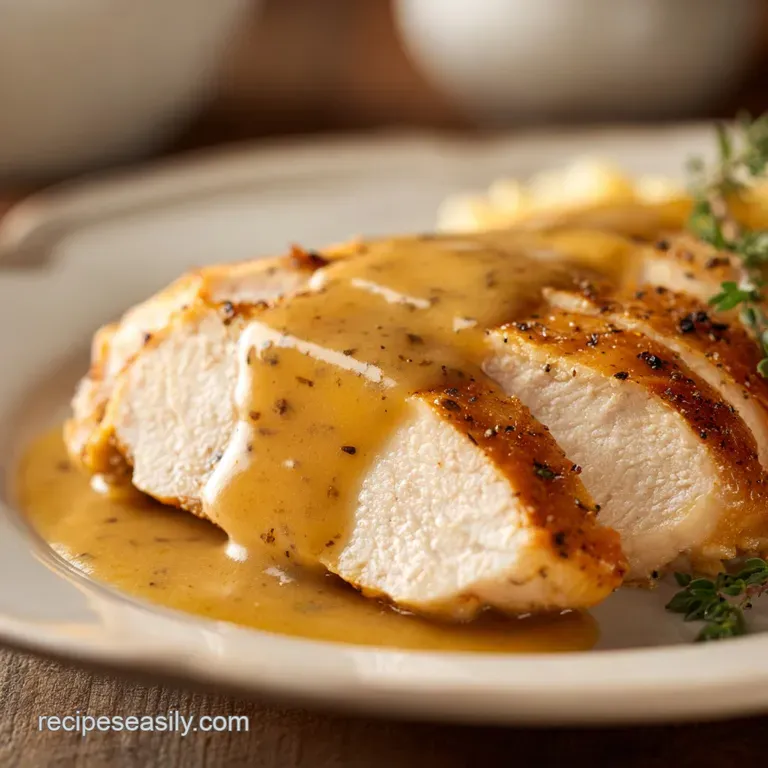
- Flavor/Texture Hook: Silky, savory, and deep golden brown
- Perfect for: Weeknight dinners, mashed potatoes, or topping fried chicken
- Essential Techniques for Smooth Texture
- Precise Success Checkpoints
- Fundamental Pantry Ingredients
- Required Kitchen Tools
- Step-by-Step Cooking Instructions
- Troubleshooting Common Errors
- Creative Flavor Variations
- Scaling for Larger Crowds
- Storage and Reheating Guidelines
- Ideal Serving Suggestions
- Myths About Homemade Gravy
- Recipe FAQs
- 📝 Recipe Card
Essential Techniques for Smooth Texture
The magic of this sauce happens because of a few simple rules of heat and friction. When we talk about why this chicken gravy recipe works, it comes down to how the starch and fat play together. It isn’t just about mixing things; it’s about timing.
- Starch Gelatinization: The flour particles swell and burst when they hit the hot stock, trapping liquid to create that thick, coating consistency.
- Fat Coating: Butter coats the flour granules individually, which stops them from clumping together when the liquid is added.
- Maillard Browning: Cooking the roux for exactly 2 minutes removes the raw flour taste and adds a subtle nuttiness to the base.
- Emulsion Stability: Slow streaming the stock allows the fat and water to bond tightly, preventing the oil from separating later.
| Method | Time | Texture | Best For |
|---|---|---|---|
| Stovetop | 10 minutes | Silky and glossy | Control and flavor depth |
| Oven (Casserole) | 45 minutes | Thick and bubbly | One pot meals |
| Microwave | 5 minutes | Thin and simple | Absolute emergencies |
Creating a stovetop gravy is almost always superior because you have total control over the heat. You can see the exact moment the flour starts to brown and smell the change in aroma. If you are looking for a way to use this technique in a full meal, you might enjoy this Stew Recipe with Potatoes which uses a similar thickening principle to create a hearty sauce.
Precise Success Checkpoints
To ensure your sauce turns out perfect, I always look for these three specific markers. First, the roux should cook for 2 minutes until it looks like wet sand and smells nutty. Second, the stock needs to be added in 60ml (1/4 cup) increments to prevent the temperature from dropping too fast.
Finally, the gravy is done when it reaches a simmer and coats a spoon without running off immediately.
| Component | Role | Pro Secret |
|---|---|---|
| Unsalted Butter | Fat Base | Use butter, not oil, for a richer mouthfeel and better browning |
| All Purpose Flour | Thickener | Toast it until pale gold to remove the "raw" grain flavor |
| Chicken Stock | Body | Use room temp stock to prevent the roux from seizing up |
| Soy Sauce | Umami | Adds salt and a deep brown color without needing drippings |
Fundamental Pantry Ingredients
We are keeping things budget friendly here. You don't need to buy a whole rotisserie chicken just for the liquid. A good quality store-bought stock or even bouillon cubes will work perfectly if you season them right.
The soy sauce is my secret weapon; it provides that "roasted" color and a hit of umami that salt alone can't touch.
- 4 tbsp (60g) Unsalted Butter: Provides the fat needed for the roux. Why this? Butter adds a creamy flavor that oil simply cannot replicate in gravy.
- Substitute: Salted butter (just reduce the extra salt later).
- 1/4 cup (30g) All Purpose Flour: The structural backbone that thickens the sauce. Why this? AP flour has the right starch content for a stable, smooth emulsion.
- Substitute: Cornstarch (use half the amount and mix with cold water first).
- 2 cups (475ml) Chicken Stock: The main flavor carrier. Why this? Stock provides a richer base than plain water or broth.
- Substitute: Vegetable stock for a lighter, different flavor profile.
- 1/2 tsp Onion Powder: Adds savory depth without the texture of real onions. Why this? It dissolves instantly into the sauce for a perfectly smooth finish.
- Substitute: Very finely minced chives added at the very end.
- 1/4 tsp Garlic Powder: Complements the onion and chicken flavors. Why this? Provides a background warmth that rounds out the saltiness.
- Substitute: One smashed garlic clove simmered in the butter, then removed.
- 1 tsp Soy Sauce: For color and savory complexity. Why this? It mimics the dark, rich flavor of caramelized meat drippings.
- Substitute: Worcestershire sauce (adds a bit more tang).
- 1/4 tsp Salt: To brighten all the other flavors.
- Substitute: Sea salt or kosher salt.
- 1/4 tsp Black Pepper: For a subtle, spicy bite.
- Substitute: White pepper for a cleaner, hidden heat.
| Original Ingredient | Substitute | Why It Works |
|---|---|---|
| Chicken Stock | Chicken Bouillon + Water | More affordable. Note: Often saltier, so skip extra salt until the end. |
| Unsalted Butter | Chicken Fat (Schmaltz) | Extreme chicken flavor. Note: Makes a very rich, traditional style gravy. |
| Soy Sauce | Liquid Aminos | Similar salty umami hit. Note: Slightly sweeter than traditional soy sauce. |
Required Kitchen Tools
You really only need a few things to make this chicken gravy recipe work, but they make a huge difference. A heavy bottomed saucepan is vital because thin pans have "hot spots" that will burn your butter before you even get the flour in. I also swear by a balloon whisk.
Spoons are okay for stirring, but a whisk is what breaks up those tiny pockets of flour that want to turn into lumps.
If you don't have a whisk, you can use a fork in a pinch, but you’ll have to work twice as hard. A measuring cup with a good pour spout is also helpful since we are adding the stock slowly. Trust me, trying to pour stock from a wide bowl into a small pan is a recipe for a messy stove.
step-by-step Cooking Instructions
- Melt the butter. Place 4 tbsp unsalted butter in a medium heavy bottomed saucepan over medium heat. Watch it closely until it melts and begins to foam. Note: The foam means the water in the butter is evaporating, leaving the flavorful fat behind.
- Form the roux. Whisk in 1/4 cup all purpose flour until a smooth, thick paste forms.
- Toast the flour. Cook the mixture for 2 minutes, whisking frequently. It should start to smell like baked pie crust and turn a pale golden color. Look for small bubbles across the entire surface.
- Add stock slowly. Stream in 2 cups of chicken stock very slowly, adding about 1/4 cup at a time.
- Whisk vigorously. After each addition of stock, whisk hard until the mixture is completely smooth before adding more. You will see it thicken into a paste then loosen into a sauce.
- Add seasonings. Once all the stock is in, whisk in 1/2 tsp onion powder, 1/4 tsp garlic powder, and 1 tsp soy sauce.
- Simmer to thicken. Bring the gravy to a gentle simmer. Do not let it boil violently, as this can break the emulsion.
- Final thickening. Continue to simmer for 3-4 minutes, whisking occasionally. The gravy is ready when it coats the back of a spoon and leaves a clear path when you run your finger through it.
- Season and serve. Taste the sauce, then add 1/4 tsp salt and 1/4 tsp black pepper. Adjust if needed and serve immediately while hot and velvety.
Troubleshooting Common Errors
The biggest heartbreak in the kitchen is a lumpy gravy. It usually happens because the liquid was added too fast or the heat was too high, causing the flour to seize up. If you see lumps forming, don't panic. Take the pan off the heat immediately and whisk like crazy.
If that doesn't work, you can always pour the whole mess through a fine mesh strainer or give it a quick zap with an immersion blender.
Another common issue is a "greasy" look. This happens when the fat separates from the liquid. This often occurs if the gravy is boiled too hard or if there wasn't enough flour to bind the butter. A splash of extra stock and a vigorous whisking session over low heat can usually bring it back together.
Eliminating Stubborn Lumps
Lumps are essentially dry flour trapped inside a cooked flour shell. They happen when the liquid hits the roux and the outside of the flour clump cooks before the inside can hydrate. To avoid this, always add your liquid in tiny increments at first. Think of it as making a paste that you slowly thin out into a sauce.
| Problem | Root Cause | Solution |
|---|---|---|
| Floury Taste | Roux didn't cook long enough | Simmer for 2 extra minutes to cook out the raw starch. |
| Too Salty | Stock was over reduced | Add a splash of water or unsalted stock to balance it out. |
| Too Thin | Not enough simmering time | Let it simmer for 2-3 more minutes; it thickens as it cools. |
Adjusting the Final Consistency
If your gravy looks more like a thick paste than a sauce, it’s likely over reduced. Simply whisk in a tablespoon of stock or water at a time until it reaches that perfect, pourable state. On the flip side, if it’s too thin, don't just add flour.
Mix a teaspoon of butter with a teaspoon of flour (a beurre manié) and whisk that into the simmering sauce.
Common Mistakes Checklist:
- ✓ Adding all the stock at once (this is the number one cause of lumps).
- ✓ Using a spoon instead of a whisk for the initial mixing.
- ✓ Not cooking the roux long enough (results in a "pasty" flavor).
- ✓ Letting the gravy boil too hard (can cause the fat to separate).
- ✓ Forgetting to taste before adding the final salt (stock saltiness varies wildly).
Creative Flavor Variations
Once you have the base down, you can take this chicken gravy recipe in a dozen different directions. I love adding a teaspoon of fresh thyme or sage at the very end for a "Sunday Roast" vibe. The herbs stay bright and fragrant without getting bitter.
If you want something richer, replace half a cup of the stock with heavy cream. This creates a "Supreme Sauce" that is incredible over chicken breasts or biscuits.
If you are serving this with fried food, consider adding a tiny pinch of cayenne pepper or a half teaspoon of Dijon mustard. The acidity and heat cut through the fat of the fried chicken perfectly.
For a deeper, darker gravy that tastes like it was made from a beef roast, double the soy sauce and add a drop of browning sauce (like Kitchen Bouquet).
Chef's Tip: If you want a truly professional finish, whisk in a cold tablespoon of butter right before serving. This "mounting" technique adds a glossy sheen and a silky mouthfeel that makes the gravy feel much more expensive than it actually is.
Scaling for Larger Crowds
If you are hosting a big dinner, you can easily double or triple this recipe. However, keep in mind that larger volumes of liquid take longer to heat up and thicken. When doubling, I suggest using 1.5x the spices first, then tasting and adding more. Sometimes, spices can become overwhelming when scaled linearly.
For half batches, use a smaller pan to prevent the liquid from evaporating too quickly. A small butter warmer or a tiny saucepan is perfect. You’ll need to reduce the simmering time by about 20% since there is less mass to heat.
If you need half an egg for a different recipe, beat it first and then measure, but for gravy, we are lucky there are no eggs to worry about!
Storage and Reheating Guidelines
Gravy stores beautifully in the fridge for up to 3 days. As it cools, it will turn into a thick jelly because of the gelatin in the stock and the starch in the flour. This is totally normal! To reheat, put it back in a saucepan over low heat and add a splash of water or stock to loosen it back up.
Whisk it as it warms to ensure it stays smooth.
You can also freeze this chicken gravy recipe for up to 3 months. I like to freeze mine in silicone ice cube trays. That way, if I just need a little bit to top a single serving of leftovers, I can pop out two cubes and microwave them. It’s a great way to reduce waste.
If you have leftover scraps like chicken skin or bones, don't toss them! You can simmer them in water to make a quick "scrap stock" for your next batch of gravy.
Ideal Serving Suggestions
This sauce is the ultimate partner for Oven Fried Chicken, where the crunchy coating meets the silky gravy. It’s also the traditional topping for a big mound of buttery mashed potatoes. But don't stop there pour it over a toasted open faced chicken sandwich or use it as a base for a quick chicken pot pie.
If you find yourself with leftovers, try making a "poutine style" snack by pouring hot gravy over frozen french fries and topping them with some shredded mozzarella or cheese curds. It is the ultimate comfort food for a late night craving.
How to get the most out of your gravy:If you want a darker color, cook the roux for 4-5 minutes until it’s the color of peanut butter. If you want a creamier sauce, whisk in 2 tablespoons of heavy cream at the very end.
If you want a zestier kick, add a squeeze of lemon juice to brighten the salty flavors.
Myths About Homemade Gravy
A lot of people think you must have pan drippings to make a good gravy. That is simply not true. While drippings add a specific depth, a well made roux combined with high-quality stock and a bit of umami (like our soy sauce trick) can produce a sauce that is 95% as good with 100% less effort.
Another myth is that you should use milk for chicken gravy. While milk makes a "white gravy" (like for biscuits), traditional chicken gravy is a "velouté" base, which uses stock for a cleaner, meatier flavor.
Finally, don't believe the lie that "more flour equals better gravy." If you add too much flour, you end up with a gloopy, gummy mess that tastes like paste. The ratio of 4 tablespoons of butter to 1/4 cup of flour is the golden ratio for 2 cups of liquid.
It gives you a sauce that is thick enough to coat a potato but thin enough to pour gracefully. Trust the ratio, trust the whisk, and you’ll never have a bad gravy day again.

Recipe FAQs
How to make simple gravy for chicken?
Melt 4 tbsp butter in a saucepan over medium heat, then whisk in 1/4 cup flour to form a roux. Cook for 8 minutes until golden, slowly stream in 2 cups of chicken stock while whisking, and simmer with onion powder, garlic powder, and soy sauce until thickened.
Can you eat gravy with diabetes?
Consult your doctor regarding your specific dietary needs. This recipe contains flour, which is a source of carbohydrates that impacts blood glucose levels.
What is the secret ingredient for good gravy?
The secret is the small amount of soy sauce added at the end. It provides an umami boost and deepens the color, which is a technique for balancing flavor profiles similar to the acid control used in our lemon chicken recipe.
What are common mistakes when making chicken and gravy?
Adding the stock too quickly is the most common error, as it prevents a smooth emulsion. Always add liquid roughly 1/4 cup at a time and whisk vigorously between each addition to ensure the starch incorporates without clumping.
Is it true I must boil the gravy rapidly to thicken it?
No, this is a common misconception. Bringing the gravy to a gentle simmer for 3 4 minutes is sufficient for the flour to hydrate and thicken the sauce; boiling it too hard can cause the fat to separate and the gravy to appear greasy.
How to fix lumpy chicken gravy?
Remove the pan from the heat immediately and whisk the mixture vigorously to break up the flour pockets. If lumps persist, pass the gravy through a fine mesh strainer or use an immersion blender to achieve a silky, smooth consistency.
How to store leftover gravy?
Keep leftovers in the refrigerator for up to 3 days or freeze for up to 3 months using silicone ice cube trays for easy portioning. When reheating, use low heat and add a splash of stock to restore the desired consistency, whisking constantly to keep it smooth.
Easy Homemade Chicken Gravy

Ingredients:
Instructions:
Nutrition Facts:
| Calories | 98 kcal |
|---|---|
| Protein | 1.6 g |
| Fat | 7.8 g |
| Carbs | 5.6 g |
| Fiber | 0.2 g |
| Sugar | 0.4 g |
| Sodium | 210 mg |
