Oven Baked Chicken Breast: Juicy and Tender
- Time: Active 10 minutes, Passive 20 minutes, Total 30 minutes
- Flavor/Texture Hook: Juicy and savory with a hint of sweetness
- Perfect for: Busy weeknights, healthy meal prep, or beginner cooks
- Making the Best Oven Baked Chicken Breast
- Why This Juicy Method Works
- Essential Components for Flavor
- Ingredients and Practical Substitutes
- Tools for Kitchen Success
- Step by Step Cooking Guide
- Fix Common Cooking Mistakes
- Easy Flavor Variations
- Practical Scaling Guidelines
- Myths About Baking Poultry
- Safe Storage and Leftovers
- Perfect Side Dish Pairings
- Recipe FAQs
- 📝 Recipe Card
Making the Best Oven Baked Chicken Breast
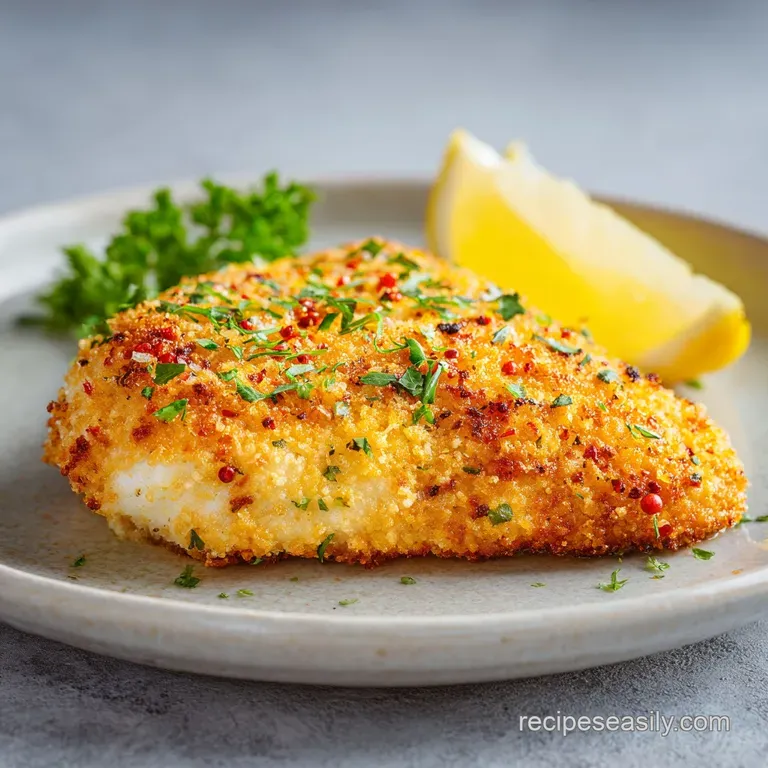
Imagine pulling a tray out of the oven and seeing meat that actually looks plump rather than shriveled. There is a specific aroma that hits you first, it is the smoky sweetness of the paprika mingling with the garlic as it toasts in the heat.
When you press a fork against the surface, there is a slight resistance before it gives way to a soft, moist center. I remember the first time I actually got this right, I realized I had been overcooking my chicken for years out of fear.
We have all been there, staring at a plate of what looks like white cardboard, reaching for the nearest bottle of ranch just to make it swallowable. This recipe changes that narrative completely.
We are focusing on a high temperature sear in the oven that locks everything in while the seasoning creates a beautiful, crusty exterior. You do not need fancy equipment or a culinary degree, just a few basic pantry staples and a bit of technique.
This is the kind of recipe you will keep in your back pocket for those Tuesday nights when you are exhausted but want something that tastes like a real meal. It is also a blank canvas. Once you master the timing and the heat, you can swap the spices for whatever you have on hand.
Let's get into the details of why this specific approach works so well every single time.
Why This Juicy Method Works
I used to think that lower heat meant more moisture, but I was wrong. The key is speed and evenness. By the time a low temperature oven cooks the center, the outside is usually parched. We are doing the opposite here.
- Uniform Thickness: Pounding the meat to 3/4 inch ensures the skinny tail and the fat "lobe" finish at the exact same moment.
- Sugar Caramelization: The small amount of brown sugar creates a quick exterior browning that mimics a pan sear without the mess.
- Osmotic Balance: The salt in the rub draws out a tiny bit of moisture which then dissolves the spices into a brine that re absorbs into the meat.
- Carryover Cooking: Stopping at 165°F (74°C) and resting allows the muscle fibers to relax and hold onto their internal liquids.
| Thickness | Internal Temp | Rest Time | Visual Cue |
|---|---|---|---|
| 3/4 inch | 165°F (74°C) | 10 minutes | Juices run clear when poked |
| 1/2 inch | 165°F (74°C) | 5 minutes | Firm to the touch |
| 1 inch | 165°F (74°C) | 12 minutes | Opaque throughout |
Choosing the right method for your schedule is important. While the oven provides a hands off experience, sometimes you might wonder if the stove is better. In my experience, the oven provides a more surround sound heat that prevents the bottom from burning before the middle is done, which is a common struggle with thicker breasts.
| Method | Time | Texture | Best For |
|---|---|---|---|
| Oven Baked | 20 minutes | Tender and even | Bulk prep and ease |
| Stovetop | 12 minutes | Crispy crust | Small batches |
| Slow Cooker | 4 hours | Shredded/Soft | Tacos and soups |
If you are looking for a different texture entirely, you might want to check out my Oven Baked Chicken Thighs recipe which handles higher fat content and extra crispy skin. Thighs are much more forgiving if you accidentally leave them in the heat for an extra five minutes.
Essential Components for Flavor
Every ingredient here serves a specific purpose. We aren't just adding things for the sake of it. The chemistry between the fat, the sugar, and the salt is what creates that "craveable" factor we usually only find in restaurants.
| Ingredient | Science Role | Pro Secret |
|---|---|---|
| Extra Virgin Olive Oil | Heat Conductor | Rub it in well to seal the pores of the meat |
| Light Brown Sugar | Maillard Catalyst | Helps the chicken brown at 425°F before it dries out |
| Smoked Paprika | Color and Depth | Provides a "charred" flavor without a grill |
| Kosher Salt | Moisture Retention | Use coarse salt to avoid over salting the surface |
I prefer using kosher salt over table salt because the larger grains make it harder to accidentally over season. If you only have table salt, cut the amount by half. It is those little adjustments that make a huge difference in the final bite.
Ingredients and Practical Substitutes
- 4 boneless skinless chicken breasts: Try to find ones around 7 to 8 oz each. Why this? They cook at the same rate and fit perfectly on a standard sheet pan. (Substitute: Boneless turkey cutlets for a leaner option)
- 2 tbsp extra virgin olive oil: This is our glue for the spices. Why this? It has a high enough smoke point for 425°F and adds a fruity richness. (Substitute: Avocado oil or melted ghee)
- 1 tsp kosher salt: The primary flavor enhancer. Why this? It penetrates the meat deeply without being "stinging" like table salt. (Substitute: Sea salt or 1.5 tsp soy sauce for an umami twist)
- 0.5 tsp freshly cracked black pepper: For a bit of back of-the throat heat. Why this? Pre ground pepper loses its aromatic oils quickly; fresh is always better. (Substitute: White pepper for a milder, more floral heat)
- 1 tsp smoked paprika: The source of that gorgeous red gold color. Why this? It adds a wood fired smell that regular paprika just can't touch. (Substitute: Sweet paprika with a pinch of cumin)
- 1 tsp garlic powder: Provides a savory base. Why this? Fresh garlic tends to burn and turn bitter at 425°F; powder stays sweet. (Substitute: Granulated garlic)
- 1 tsp onion powder: Adds sweetness and depth. Why this? It mimics the flavor of sautéed onions without the moisture of real onions. (Substitute: Shallot powder)
- 0.5 tsp dried oregano: For an earthy, herbal note. Why this? Dried herbs hold their flavor better than fresh in over high heat roasting. (Substitute: Dried thyme or Italian seasoning)
- 1 tsp light brown sugar: The secret to a beautiful crust. Why this? The molasses helps with browning and balances the savory spices. (Substitute: Coconut sugar or honey)
Tools for Kitchen Success
You don't need a pantry full of gadgets, but two things are non negotiable for this oven baked chicken breast. First, a heavy duty rimmed baking sheet. It prevents any juices from dripping onto the bottom of your oven and causing a smoke alarm situation. Second, a meat mallet or a heavy rolling pin.
We are not trying to pulverize the meat into a pancake, we just want it to be a flat, even landscape.
Parchment paper is also your best friend here. It makes cleanup a five second job and prevents the chicken from sticking to the metal. If you don't have parchment, a silicone baking mat works, but avoid using aluminum foil if you want the bottom to stay slightly crisp.
Foil tends to trap steam against the meat, which can lead to a slightly rubbery texture on the underside.
step-by-step Cooking Guide

- Preheat your oven to 425°F (220°C). Note: A hot oven is vital for creating a crust before the inside overcooks.
- Even the thickness. Place the chicken breasts between two sheets of plastic wrap and use a mallet or rolling pin to pound the thickest part until the entire piece is an even 3/4 inch thickness. Keep pounding until it looks uniform across the board.
- Dry the meat. Pat the chicken bone dry with paper towels to remove excess moisture. Wait until there is no visible shine on the surface.
- Apply the oil. Rub both sides of each breast with the olive oil. Note: This helps the spices stick and prevents the meat from drying out.
- Mix the spices. In a small bowl, combine the salt, pepper, smoked paprika, garlic powder, onion powder, dried oregano, and brown sugar.
- Season generously. Sprinkle the blend over both sides of the meat and press it in firmly with your hands. Ensure every inch is covered in red gold dust.
- Arrange and bake. Place the chicken on a parchment lined rimmed baking sheet. Bake on the center rack for 18-22 minutes.
- Check for doneness. Remove the chicken from the oven when an instant read thermometer reaches 165°F (74°C). Stop when the internal temp hits that magic number.
- The crucial rest. Allow the meat to rest for 10 minutes before slicing. Note: This allows the juices to settle back into the fibers instead of spilling onto the cutting board.
Fix Common Cooking Mistakes
Even with the best intentions, things can go sideways. I remember my first attempt where I skipped the pounding step. One end was dry like sawdust while the other was still pink. It was a mess. Most issues with baked chicken come down to physics and patience.
Why Your Meat Is Tough
If the chicken feels like a rubber band in your mouth, it usually means it was cooked too long or not rested. When heat is applied, muscle fibers contract and squeeze out liquid. If you cut into it immediately, that liquid escapes.
Why the Spices Taste Bitter
This usually happens if your oven has hotspots or if the sugar in the rub burnt. Make sure you are using the middle rack. If you notice the chicken is darkening too fast, you can loosely tent it with foil for the last five minutes, but this is rarely needed at 425°F if the chicken is pounded correctly.
| Problem | Root Cause | Solution |
|---|---|---|
| Dry and stringy | Internal temp exceeded 170°F | Use a thermometer and pull at 165°F |
| Spices won't stick | Meat was too wet | Pat dry with paper towels before oiling |
| Uneven cooking | One side thicker than other | Pound to a consistent 3/4 inch thickness |
Common Mistakes Checklist
- ✓ Never skip the pounding step, it is the only way to ensure even cooking.
- ✓ Always use a meat thermometer rather than "guessing" by the color.
- ✓ Ensure your oven is fully preheated before the tray goes in.
- ✓ Don't overcrowd the pan, leave at least an inch between each breast.
- ✓ Let the meat rest for the full 10 minutes, even if you are starving.
Easy Flavor Variations
Once you have the base down, you can start getting creative. If you want a more Mediterranean vibe, swap the paprika for dried rosemary and add a squeeze of fresh lemon juice right before serving. For a spicy version, a half teaspoon of cayenne pepper in the rub will wake up your taste buds.
If you are a fan of using appliances to make your life easier, you might enjoy my Slow Cooker Garlic Herb Chicken. It uses a completely different logic, focusing on low and slow heat to break down the meat until it is tender enough to pull apart with a fork, which is a great alternative to the "slice and serve" style we are doing today.
Practical Scaling Guidelines
If you are cooking for a crowd or just yourself, you need to adjust more than just the number of breasts.
- For 1-2 people: You can use a smaller quarter sheet pan. The cook time remains the same because the thickness of the meat hasn't changed.
- For 8 or more: You will likely need two baking sheets. Make sure to rotate them halfway through the baking time (top to bottom) to account for oven heat variations.
- Spice adjustments: If doubling the recipe, you don't always need to double the salt exactly. Start with 1.5 times the salt to avoid it becoming too salty, as surface area doesn't increase linearly.
| Premium Ingredient | Budget Alternative | Flavor Impact | Savings |
|---|---|---|---|
| Organic Chicken | Conventional Breast | Minimal if seasoned well | $4-6 per lb |
| EVOO | Vegetable Oil | Less "grassy" flavor | $2-3 per batch |
| Smoked Paprika | Regular Paprika | Loses the "char" aroma | $1-2 per jar |
Myths About Baking Poultry
There is a big myth that you need to wash your chicken before cooking. Please, don't do this. It doesn't kill bacteria; it just splashes them all over your sink and counters. The heat of a 425°F oven is what makes the meat safe to eat.
Another common misconception is that "clear juices" always mean it is done. While it is a good sign, sometimes bone in or very thick breasts can have clear juices but still be undercooked near the center.
Relying on an internal temperature of 165°F is the only scientifically safe way to know for sure.
Finally, many people think you have to marinate chicken for hours to get flavor. While marinating is great, a strong dry rub like the one in this recipe is actually more effective at creating a flavorful "crust" because it doesn't introduce extra surface moisture that leads to steaming.
Safe Storage and Leftovers
If you have leftovers, you are in luck. This chicken stays remarkably moist if handled correctly.
- Fridge: Store in an airtight container for up to 4 days. I like to keep the breasts whole and slice them only when I am ready to eat to keep the moisture locked inside.
- Freezer: You can freeze these for up to 3 months. Wrap them tightly in plastic wrap and then place them in a freezer bag.
- Zero Waste Tip: Don't throw away the juices left on the parchment paper! Pour them over the chicken before storing, or use them to flavor a quick pan sauce for pasta the next day.
- Reheating: Avoid the microwave if possible. Reheat in a 350°F oven with a splash of water or chicken broth covered in foil for about 10 minutes. This prevents the "rubbery" texture that microwaves often cause.
Perfect Side Dish Pairings
Because this chicken has a savory, slightly smoky profile, it pairs beautifully with bright or creamy sides. A simple roasted broccoli with lemon zest or a fluffy pile of mashed potatoes works perfectly.
If you want to keep things light, a crisp arugula salad with a balsamic vinaigrette cuts through the richness of the smoked paprika.
For a more comforting meal, I often serve this alongside a hearty casserole. It fits right in with the flavors of my Chicken Rice Casserole if you are looking for a complete dinner solution. The key is to choose sides that won't compete with the spice rub but rather complement its warmth. Try some honey glazed carrots or even a simple corn on the cob during the summer months.

Recipe FAQs
Is it better to bake chicken at 350 or 400 in the oven?
Neither, 425°F is the ideal temperature. A higher heat is essential to develop a golden crust on the exterior before the interior meat dries out.
How long do you put chicken breast in the oven at 400 degrees?
Avoid using 400°F and set your oven to 425°F instead. At this higher temperature, you should bake the chicken for 18 22 minutes until a thermometer reaches 165°F.
Is chicken breast good for diabetics?
Yes, it is an excellent lean protein source. Because this recipe uses a simple herb and spice blend without heavy sauces or breading, it fits well into a diabetic friendly meal plan.
How long can chicken breast at 350 in the oven?
Do not bake at 350°F as it often leads to tough, dry chicken. Following the official instruction to bake at 425°F ensures the meat stays juicy while cooking through in about 20 minutes.
Why is it necessary to pound the chicken to an even 3/4 inch thickness?
Pounding ensures uniform cooking across the entire piece. If you enjoyed mastering the even cooking technique here, you will find it equally important for ensuring consistent results in other stovetop or oven baked poultry dishes.
Is it okay to slice the chicken immediately after taking it out of the oven?
No, you must let the meat rest for 10 minutes. Resting allows the internal juices to redistribute throughout the fibers, keeping the chicken moist instead of losing all that flavor onto the cutting board.
How do I know for sure if the chicken is done?
Use an instant read meat thermometer to verify the internal temperature. The chicken is perfectly cooked once it hits 165°F, which is far more reliable than checking for color changes or clear juices.
Juicy Oven Baked Chicken Breast
Ingredients:
Instructions:
Nutrition Facts:
| Calories | 416 kcal |
|---|---|
| Protein | 66 g |
| Fat | 14.7 g |
| Carbs | 1.5 g |
| Fiber | 0.2 g |
| Sugar | 1.1 g |
| Sodium | 478 mg |
