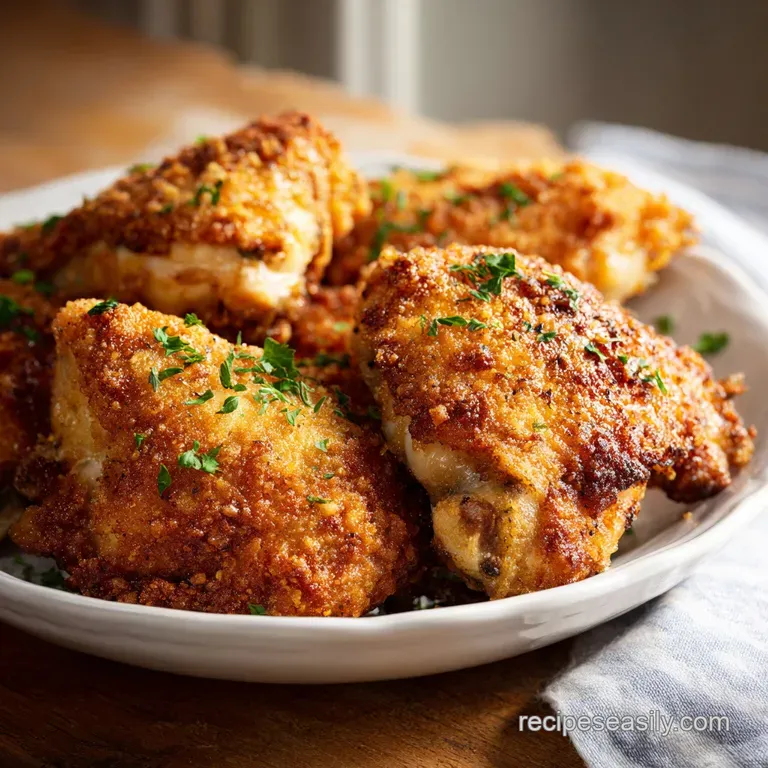
Oven Baked Chicken Thighs
- Time: Active 10 minutes, Passive 35 minutes, Total 45 minutes
- Flavor/Texture Hook: Shatter crisp skin with buttery, soft roasted potatoes
- Perfect for: Busy weeknights, meal prepping on a budget, and beginner cooks
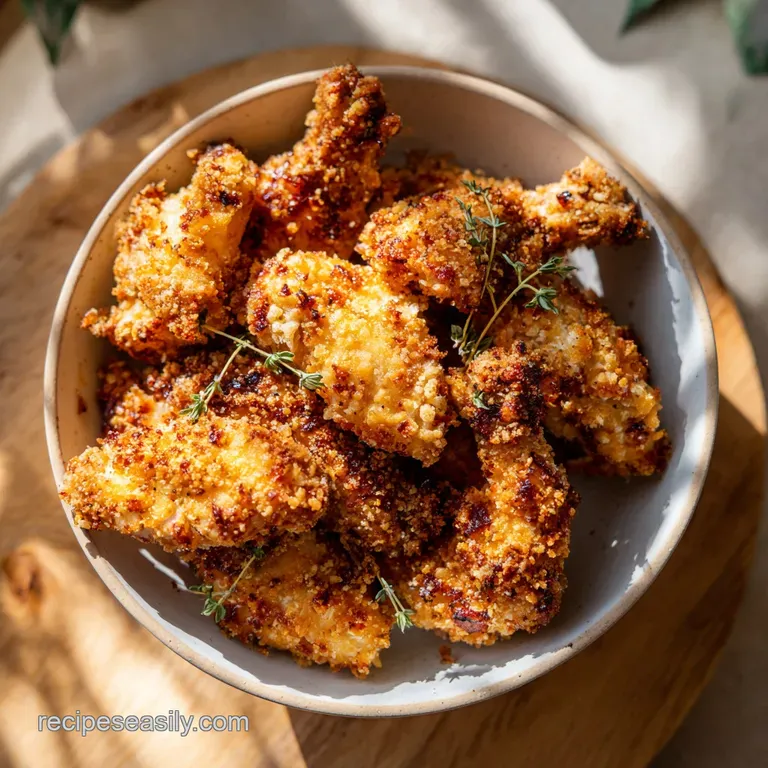
- Perfect Crispy Oven Baked Chicken Thighs
- Why This Works
- Ingredient Deep Dive
- Pantry Essentials for Big Flavor
- Essential Tools for Maximum Crunch
- Step by Step Cooking Process
- Solving Common Texture and Flavor Issues
- Timing and Precision for Golden Results
- Healthy and Budget Friendly Variations
- Kitchen Myths About Roasting Chicken
- Storing and Reusing Your Leftovers
- Finishing Touches and Side Dish Ideas
- Recipe FAQs
- 📝 Recipe Card
Perfect Crispy Oven Baked Chicken Thighs
There is nothing more heartbreaking than pulling a tray out of the oven, smelling that beautiful spice blend, and biting into a piece of chicken only to find the skin is a flabby, rubbery mess.
I remember the first time I tried to make a big Sunday dinner for my family; I followed a recipe that used a low temperature, thinking "low and slow" was the secret to juicy meat. I ended up with gray, soggy skin that peeled right off.
It was a texture nightmare that honestly almost turned me off from cooking thighs entirely.
But here is the thing: we don't have to settle for sub par textures just because we're cooking on a budget. The fix isn't a fancy gadget or an expensive marinade. It's actually much simpler than that. We need to stop steaming our meat and start roasting it.
By focusing on removing surface moisture and hitting the tray with high, dry heat, you can get a skin that actually crackles when you touch it with a fork.
This recipe is the result of me getting tired of "good enough" chicken. We are going for "restaurant quality" results using a single baking sheet and some basic pantry staples. I've realized that the potatoes aren't just a side dish here they actually act as a flavor sponge for all the golden schmaltz that renders out of the chicken.
It's smart, it's efficient, and it’s going to change how you look at a $5 pack of chicken thighs from the grocery store.
Why This Works
I spent a long time wondering why my chicken was always hit or-miss until I looked at the actual mechanics of the oven. This recipe works because it balances fat rendering with high speed evaporation. It's not magic, it's just a few simple principles that ensure you never have a soggy dinner again.
- Surface Evaporation: Patting the chicken extremely dry removes the water molecules that would otherwise turn into steam, allowing the skin to reach the "shatter" stage much faster.
- Fat Rendering: The 425°F temperature is high enough to melt the thick layer of subcutaneous fat under the thigh skin before the meat protein starts to overcook and tighten.
- Starch Protection: The potatoes are halved and placed cut side down, allowing them to roast in the dripping chicken fat which creates a velvety interior and a crispy, fried like exterior.
- Single Layer Airflow: Using a large rimmed baking sheet ensures that air can circulate around each piece of chicken, preventing the "crowding effect" where meat just boils in its own juices.
| Cooking Method | Total Time | Texture Result | Best For |
|---|---|---|---|
| Stovetop Skillet | 25 minutes | Ultra crisp skin, can be dry | Small batches, quick meals |
| Oven Roasting | 45 minutes | Even browning, juicy interior | Hands off cooking, big families |
| Air Fryer | 30 minutes | Very crispy, limited space | 1-2 people, crispy cravings |
Roasting in the oven gives you a much better consistency across the whole tray compared to a skillet where you have to constantly manage hot spots. If you're looking for that specific air-fried texture but have more than two people to feed, the oven is your best friend. In fact, if you only have a small batch to cook, you might want to try Air Fryer Chicken Thighs for a similar result in slightly less time.
Ingredient Deep Dive
Before we start tossing things into a bowl, let's talk about why these specific items are on the list. I'm all about smart swaps that don't sacrifice the final bite.
| Ingredient | Science Role | Pro Secret |
|---|---|---|
| Bone In Thighs | Retains moisture and provides fat | Keeps the meat from drying out at high heat |
| Avocado Oil | High smoke point carrier | Doesn't burn or smoke at 425°F like butter or olive oil |
| Smoked Paprika | Provides color and depth | Adds a "fire roasted" flavor without a grill |
| Sea Salt | Draws out moisture for crisping | Use coarse grains for better surface area coverage |
The combination of avocado oil and high heat is the real hero here. If you use a lower smoke point oil, your kitchen will end up full of smoke before the chicken is even halfway done. Also, don't skimp on the salt; it's what helps break down the skin proteins so they can crisp up properly.
Pantry Essentials for Big Flavor
- 2 lbs bone in, skin on chicken thighs: Approximately 4-6 large thighs. Why this? The bone acts as a thermal conductor, cooking the meat evenly from the inside.
- Substitute: Boneless thighs (reduce cook time by 10 minutes).
- 1 lb baby Yukon Gold potatoes: Halved. Why this? They have a creamy texture that holds up perfectly under roasting temperatures.
- Substitute: Red potatoes (slightly more waxy, will be less "fluffy" inside).
- 2 tbsp avocado oil: Essential for the over high heat roast. Why this? It has a neutral flavor and won't smoke at 425°F.
- Substitute: Grapeseed oil or refined light olive oil.
- 1 tsp sea salt: To season and draw out moisture. Why this? Enhances every other spice in the rub.
- Substitute: 3/4 tsp table salt (it’s denser, so use less).
- 1 tsp smoked paprika: For that deep mahogany color. Why this? Gives the chicken a "rotisserie" look and smokey scent.
- Substitute: Sweet paprika (lacks the smoke, but adds the same color).
- 1 tsp garlic powder: Essential savory base. Why this? Doesn't burn like fresh garlic does at high heat.
- Substitute: Granulated garlic.
- 1/2 tsp onion powder: Adds sweetness and depth. Why this? Distributes flavor more evenly than fresh onions.
- Substitute: Shallot powder.
- 1/2 tsp cracked black pepper: For a bit of bite. Why this? Freshly cracked provides a much bolder aroma.
- Substitute: White pepper for a more subtle heat.
- 1/4 tsp cayenne pepper: For a gentle back end warmth. Why this? Just enough to wake up the palate without being "spicy."
- Substitute: Red pepper flakes (crushed) or omit for zero heat.
Essential Tools for Maximum Crunch
You don't need much, but a heavy duty rimmed baking sheet is non negotiable. If you use a thin, flimsy tray, it might warp in the high heat, causing the oil to pool in one corner and leaving half your chicken dry while the other half deep fries.
I also highly recommend using a digital meat thermometer. Trusting your eyes is okay, but knowing for a fact that your chicken is at exactly 165°F is the difference between a juicy dinner and a dry one.
A large mixing bowl is also much better than trying to season everything directly on the tray. You want every nook and cranny of those potatoes and the skin folds of the chicken to be coated in oil and spices.
If you're out of parchment paper, you can use foil, but parchment is better for preventing the potatoes from sticking to the tray.
step-by-step Cooking Process
- Preheat the oven to 425°F (220°C). Line your heavy duty baking sheet with parchment paper. Note: This high temp is the key to rendering the chicken fat quickly.
- Pat the chicken thighs extremely dry using paper towels. Get under the skin folds too. Note: Any leftover water will create steam, which prevents the skin from becoming crispy.
- Mix the dry rub ingredients in a small bowl: sea salt, smoked paprika, garlic powder, onion powder, black pepper, and cayenne.
- Toss chicken and potatoes in a large mixing bowl with the avocado oil. Ensure every inch is glossy.
- Add the spice blend to the bowl and toss again until the color is uniform across the meat and veg.
- Arrange on the baking sheet in a single layer, ensuring the chicken thighs are skin side up.
- Roast for 35 minutes until the skin is a dark mahogany color and crackles when touched.
- Check for doneness using a thermometer; it should read 165°F (74°C) in the thickest part.
- Rest the chicken for 5 minutes on the tray before serving. Note: This allows the juices to redistribute so they don't run out when you bite in.
- Serve immediately while the skin is at its peak crunchiness.
Solving Common Texture and Flavor Issues
Why Your Chicken Skin Is Soft
This usually happens because of "steam trapping." If you overcrowd the pan, the moisture escaping the chicken has nowhere to go, so it hangs around and keeps the skin damp. Another culprit is not patting the meat dry. Even a little bit of surface moisture can ruin the Maillard reaction.
Always use a large tray and give each thigh at least an inch of "personal space."
Why Your Potatoes Are Hard
If the chicken is done but the potatoes are still firm, they were likely cut too large or weren't coated well in oil. Potatoes need that fat to soften the starch. Next time, try cutting them into smaller quarters or ensuring they are tucked near the chicken so they can soak up the rendering fat.
If you’re using larger potatoes, you might want to par boil them for 5 minutes before roasting.
| Problem | Root Cause | Solution |
|---|---|---|
| Burnt Spices | Paprika/Garlic on top of skin | Toss in oil first to "insulate" the spices |
| Dry Meat | Overcooked beyond 175°F | Use a thermometer and pull at 165°F |
| Sticking Potatoes | Lack of oil or no parchment | Use parchment and toss thoroughly in a bowl |
Common Mistakes Checklist
- ✓ Never skip the "pat dry" step with paper towels (it's the most important part).
- ✓ Don't use a glass baking dish; it doesn't conduct heat as well as metal for crisping.
- ✓ Avoid checking the oven every 5 minutes you lose all that precious high heat.
- ✓ Ensure the oven is fully preheated before the tray goes in.
- ✓ Don't pour extra water or liquid into the pan "for moisture" this will steam the skin.
Timing and Precision for Golden Results
If you find yourself cooking for a larger crowd, scaling this recipe is pretty straightforward, but you have to be careful about the physics of your oven. When you double the recipe, you can't just cram twice as much chicken onto one tray. You'll need two separate baking sheets.
Because more food in the oven creates more ambient moisture, I usually increase the cook time by about 5 to 7 minutes to compensate.
When scaling down for one or two people, the cook time usually stays the same because we want that over high heat impact regardless of quantity. If you are doing a half batch, you might find that the potatoes roast even faster since there is more air circulating. Keep an eye on them around the 25 minute mark. If you're looking for a smaller, leaner meal, you could swap the thighs for my Oven Baked Chicken Breast recipe, which focuses on a slightly different temperature profile to keep the leaner meat moist.
Healthy and Budget Friendly Variations
- The Lemon Herb Swap: Instead of the paprika and cayenne, use dried oregano, thyme, and the zest of one lemon. It gives a bright, Mediterranean feel without adding any cost.
- Low Carb Version: Swap the potatoes for cauliflower florets or radishes. Radishes lose their "bite" when roasted and become surprisingly similar to potatoes in texture.
- Spiced Honey Glaze: In the last 5 minutes of roasting, brush a tiny bit of honey mixed with apple cider vinegar over the skin. It adds a sticky, sweet and sour element that feels very premium.
- Mediterranean Style: Toss in some whole cloves of garlic (peeled) and some olives in the last 15 minutes of roasting for a one pan meal that tastes like a vacation.
Kitchen Myths About Roasting Chicken
Many people believe that you have to sear chicken in a pan before putting it in the oven to "lock in juices." This is actually a myth. Searing is about flavor (the Maillard reaction), not moisture retention.
At 425°F, the oven is hot enough to create that same flavor and crust without the extra step of stovetop frying. It saves you a dirty pan and a lot of grease splatters on your stove.
Another common misconception is that washing your chicken makes it "cleaner." Honestly, don't even bother with this. Washing chicken in the sink just splashes bacteria around your kitchen. The high heat of the oven is what actually kills any pathogens.
Just take it out of the package, pat it dry with paper towels (which you then throw away), and get to seasoning.
Storing and Reusing Your Leftovers
Storage: You can keep these chicken thighs in an airtight container in the fridge for up to 4 days. The skin will naturally lose its crunch as it sits in the fridge, but the flavor actually deepens. If you want to freeze them, they’ll stay good for up to 3 months.
Just make sure they are completely cool before you seal them up to avoid ice crystals forming from the steam.
Zero Waste: Don't you dare throw away those chicken bones! Once you've eaten the meat, put the bones in a freezer bag. When you have enough, throw them into a pot with some veggie scraps (onion skins, carrot ends, celery leaves) and water to make a rich, homemade bone broth.
Also, if you have leftover potatoes, they are incredible the next morning chopped up and fried in a skillet as breakfast hash with a runny egg on top.
Finishing Touches and Side Dish Ideas
To really make this dish pop, I love to hit it with a squeeze of fresh lemon juice right as it comes out of the oven. The acidity cuts through the richness of the rendered chicken fat perfectly.
A sprinkle of fresh parsley also adds a "just cooked" vibrance that makes the whole tray look like it belongs on a magazine cover.
As for pairings, since you already have your starch (potatoes) and protein (chicken) on one tray, a simple green salad is all you need. A quick arugula salad with a balsamic vinaigrette provides a nice peppery contrast to the smoky paprika.
If you want something warm, steamed green beans or roasted broccoli (which you can actually throw onto the same tray if you have space!) work beautifully. This recipe is all about making your life easier while still eating like royalty on a budget.
Trust me, once you hear that first "crunch" of the skin, you'll never go back to low temp roasting again.

Recipe FAQs
Is it better to bake bone-in chicken thighs at 350 or 400?
Neither; 425°F is the optimal temperature. High heat is necessary to render fat quickly and achieve crispy skin, which you cannot accomplish at lower settings.
How long does it take for chicken thighs to cook at 425 degrees?
Roast for exactly 35 minutes. This duration ensures the chicken reaches an internal temperature of 165°F while the skin turns a deep, crispy mahogany.
Can a diabetic eat baked chicken?
Yes, this recipe is suitable for a diabetic diet. It relies on protein and healthy fats from avocado oil without the addition of sugars or carbohydrates.
Can I eat chicken thighs with IBS?
Yes, if your specific dietary triggers allow these ingredients. This dish contains no dairy, gluten, or common high FODMAP additives, making it a safer option for sensitive digestion.
Why is my chicken skin not getting crispy?
Excess surface moisture is preventing the skin from crisping. You must pat the thighs extremely dry with paper towels before seasoning to ensure the Maillard reaction occurs efficiently.
How to avoid overcooking the baby Yukon Gold potatoes?
Halve the potatoes uniformly to ensure even roasting. If you enjoyed mastering the one-pot meal technique here, you will find that consistent sizing is the secret to perfect doneness for both proteins and starches in a single pan.
Is it safe to store leftovers for later?
Yes, store them in an airtight container in the refrigerator for up to 4 days. While the skin will lose some crispness, the flavors continue to develop and improve overnight.
Oven Baked Chicken Thighs

Ingredients:
Instructions:
Nutrition Facts:
| Calories | 628 kcal |
|---|---|
| Protein | 40g |
| Fat | 42g |
| Carbs | 22g |
| Fiber | 3g |
| Sugar | 1g |
| Sodium | 645mg |
