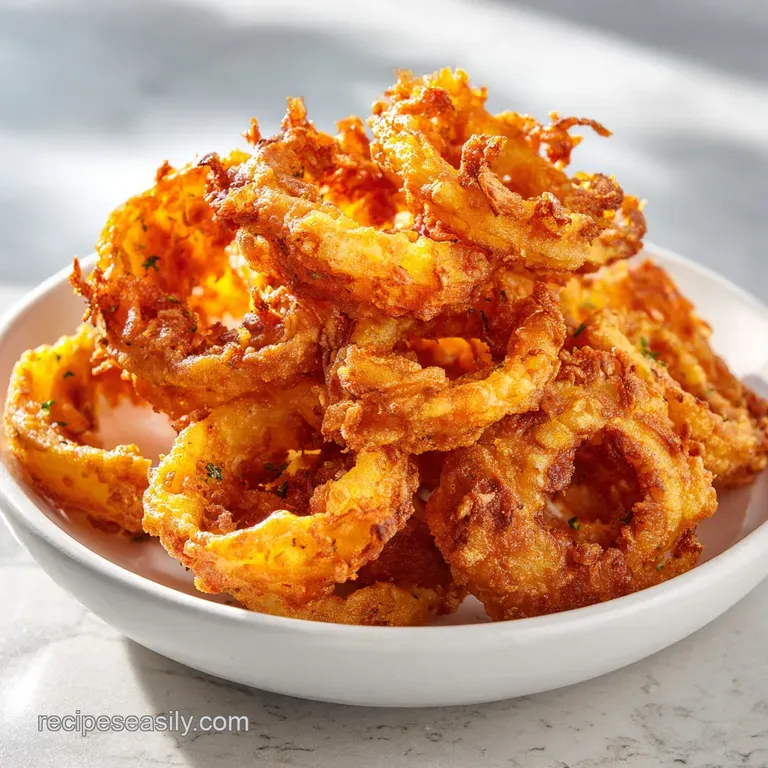
Crispy Buttermilk Onion Rings: Shatter Crisp
- Time: 15 min active + 10 min soaking = Total 30 mins
- Flavor/Texture Hook: Shatter crisp Panko crust with a tangy, velvety onion center
- Perfect for: Game day appetizers or a steakhouse style side dish
Sizzle. That's the sound of a ring hitting 350°F oil, and it's the best part of the whole process. But let's be real: we've all had those home-made rings where the batter just... slides off.
You take one bite and the entire crust slips away, leaving you with a naked, rubbery piece of onion and a pile of fried dough on your plate. It's a total tragedy.
The secret isn't some fancy equipment, but how you prep the onion. Most people just dip and fry, but skipping the soak is where they go wrong. The acid in the buttermilk tenderizes the onion and creates a sticky surface that the flour actually clings to.
This crispy buttermilk onion rings recipe is my targeted fix for that "batter slip" problem. By using a double dredge method and a specific mix of cornstarch and Panko, we're building a crust that's structurally sound and incredibly light.
Trust me, once you hear that first crackle, you'll never go back to the frozen bag.
The Secret to the Crunch
Getting that steakhouse level crunch at home usually feels like a gamble, but it's actually just about managing moisture. If the onion is too wet, the batter steams from the inside out, resulting in a soggy mess. If it's too dry, the coating doesn't stick.
The magic happens when we combine a buttermilk soak with a cornstarch heavy flour mix. The cornstarch interferes with gluten development, which means the crust stays crisp instead of becoming bready or chewy. It's the difference between a shell that shatters and one that just bends.
Right then, let's look at what's actually happening in the pan. When the Panko hits the hot oil, the air pockets between the large crumbs fry instantly, creating a jagged, high surface area crust. This is why Panko beats regular breadcrumbs every single time for this specific dish.
- Acidic Tenderizing
- Buttermilk breaks down the tough cell walls of the onion, making it velvety.
- Starch Barrier
- Cornstarch absorbs excess surface moisture, preventing the batter from peeling.
- Panko Texture
- Large crumb size creates more "edges" for the oil to crisp, increasing the crunch.
- Double Adhesion
- The flour buttermilk Panko sequence creates a reinforced wall of crunch.
| Method | Prep Time | Texture | Best For |
|---|---|---|---|
| Fresh Buttermilk | 30 mins | Shatter crisp | Special dinners |
| Simple Batter | 15 mins | Soft/Bready | Quick snacks |
| Frozen/store-bought | 10 mins | Dense/Hard | Low effort |
What Makes This So Good
I used to think that just any flour would do, but the blend here is what makes this recipe work. The addition of paprika and cayenne doesn't just add a hint of heat, it adds a deep, mahogany color that makes the rings look like they came from a professional kitchen.
Another thing I've learned the hard way: don't overcrowd the pan. If you throw ten rings in at once, the oil temperature plummets. Instead of frying, the onions start poaching in grease, and that's how you get oily, heavy rings. Work in small batches, keep the heat steady, and you'll get that golden brown finish.
If you're looking for other sides that bring that same comfort level, you might like my Broccoli Casserole recipe, which uses a similarly velvety base to balance out the crunch.
Recipe Specs
Before we get into the grit, let's talk about the "why" behind the ingredients. I've spent way too much time experimenting with different flours, and this specific ratio of AP flour to cornstarch is the sweet spot.
| Ingredient | Science Role | Pro Secret |
|---|---|---|
| Buttermilk | pH Balance | Use full fat for a richer, more velvety onion |
| Cornstarch | Crisp Agent | Don't skip this, or the crust will be "cakey" |
| Panko | Structural Crunch | Press firmly to avoid gaps in the coating |
| Cayenne | Flavor Depth | Just a pinch prevents it from being "spicy" |
Equipment Needed
You don't need a professional deep fryer, but a few specific tools make this a lot easier. A cast iron skillet is my favorite because it holds heat way better than a thin stainless steel pan. If the temperature stays stable, the rings cook evenly.
I also highly recommend a wire cooling rack. Putting fried food directly onto paper towels often traps steam underneath the ring, which turns the bottom soggy in about two minutes. A rack lets the air circulate, keeping the bottom just as crispy as the top.
For the onions, a sharp chef's knife is non negotiable. You want clean, uniform cuts. If you tear the onion slices, the batter will leak through the gaps, and you'll lose that satisfying "snap" when you bite into them.
Ingredient Deep Dive
Here is exactly what you'll need. I've included some swaps because I know not everyone has buttermilk sitting in the fridge.
- 1 cup buttermilk Why this? Adds tang and helps the flour stick (Sub: 1 cup milk + 1 tbsp lemon juice)
- 1 large yellow onion, sliced into 1/4 inch rings Why this? Balanced sweetness and structure (Sub: Vidalia onion for more sweetness)
- 1 cup all purpose flour Why this? Provides the main body of the coating (Sub: 1:1 gluten-free flour blend)
- 1/2 cup cornstarch Why this? Prevents gluten buildup for a crispier shell (Sub: Potato starch)
- 1 tsp salt Why this? Essential for flavor balance
- 1/2 tsp black pepper Why this? Adds a subtle woody heat
- 1/2 tsp paprika Why this? For that deep golden color (Sub: Smoked paprika for a wood fired taste)
- 1/4 tsp cayenne pepper Why this? Wakes up the other spices (Sub: White pepper for a milder kick)
- 1 cup Panko breadcrumbs Why this? Unbeatable shatter crunch texture (Sub: Regular breadcrumbs, though less crunchy)
- 3 cups vegetable oil Why this? High smoke point for clean frying (Sub: Peanut oil or Canola oil)
How to Make It
Let's crack on. Follow these steps closely, especially the double dip part, to ensure this crispy buttermilk onion rings recipe turns out perfect.
- Slice the onion into uniform 1/4 inch rings and submerge them in buttermilk. Let them soak for 10 minutes. Note: This softens the onion and prepares the surface for the flour.
- In a mixing bowl, whisk together the all purpose flour, cornstarch, salt, black pepper, paprika, and cayenne pepper until well combined.
- Remove onions from the buttermilk and toss them in the seasoned flour mixture, shaking off any excess. Note: You want a thin, even coating, not a thick paste.
- Dip the floured rings back into the buttermilk briefly, then press them firmly into the Panko breadcrumbs. Note: The double dip is the secret to a thick, durable crust.
- Heat vegetable oil in a cast iron skillet or deep fryer to 350°F (175°C). Note: Use a thermometer; guessing the temp is how you get greasy rings.
- Fry onion rings in batches of 4-5 for 2-3 minutes per side until they reach a deep mahogany color.
- Transfer fried rings to a wire cooling rack and drain on paper towels. Note: This prevents the bottom from steaming and getting soft.
Chef's Tip: To get an even more intense crunch, try freezing your Panko breadcrumbs for 10 minutes before using. Cold crumbs hit the hot oil and create a more dramatic temperature shock, which can lead to a lighter, airier crust.
Troubleshooting Guide
Even for experienced cooks, frying can be finicky. Most issues come down to temperature or moisture. If you're seeing the batter separate from the onion, it's usually because the onion was too wet or the oil wasn't hot enough.
| Issue | Solution |
|---|---|
| Why Your Batter Peels Off | This usually happens if the flour wasn't pressed firmly into the onion or if the oil temperature dropped too low. According to Serious Eats, maintaining a consistent oil |
| Why Your Rings are Greasy | Overcrowding the pan is the number one culprit. When you add too many cold rings at once, the oil temp dives. This means the oil seeps into the breading instead of frying the outside instantly. Keep y |
| How to Stop Sogginess | Sogginess happens the moment you pile hot rings on top of each other on a plate. The steam from the bottom rings gets trapped and softens the crust. Use a wire rack and serve them immediately. |
Common Mistakes Checklist
- ✓ Did you soak the onions for a full 10 minutes?
- ✓ Is your oil exactly 350°F before the first ring goes in?
- ✓ Did you shake off the excess flour before the second dip?
- ✓ Are you using a wire rack instead of a flat plate for draining?
- ✓ Did you avoid overcrowding the skillet?
Adjusting the Batch Size
If you're just making a snack for yourself or feeding a whole football team, you'll need to tweak the process.
Scaling Down (½ Batch) If you're cutting the recipe in half, use a smaller skillet. This ensures you have enough oil depth without wasting a whole quart. You can reduce the frying time by about 20% since there are fewer rings absorbing the heat, but still look for that mahogany color.
Scaling Up (2x-4x Batch) When doubling or tripling, don't just multiply the spices by four. I recommend scaling the salt and cayenne to about 1.5x first, then tasting a small bit of the batter. For the oil, work in strictly controlled batches.
If you try to rush it, you'll end up with a massive pile of greasy rings. Also, keep your breaded rings on a baking sheet in the fridge while the first batch fries so the coating stays set.
Clearing Up Some Myths
There's a lot of conflicting advice on frying, so let's set the record straight.
The "High Heat" Myth Some people think the hotter the oil, the crispier the ring. That's a lie. If your oil is 400°F, the Panko will burn to a bitter black before the onion even softens. 350°F is the sweet spot for a golden exterior and a tender interior.
The "Cold Oil" Myth You might hear that putting rings in cold oil and heating them up together prevents grease. In reality, this is a recipe for an oil soaked sponge. The "shock" of the hot oil is what creates the steam barrier that keeps grease out.
Storage and Zero Waste
Fried foods aren't known for aging well, but you can still save them if you're smart about it.
Storage Guidelines Store leftover rings in an airtight container in the fridge for up to 2 days. Do not put them in a sealed plastic bag while they are even slightly warm, or they'll turn into mush. For long term storage, you can freeze them for 1 month, though the texture will degrade slightly.
The Best Way to Reheat Forget the microwave. It will make them rubbery. Use an oven or an air fryer at 375°F for about 5 minutes. This draws out the remaining oil and restores that shatter crisp feel.
Zero Waste Tips Don't throw away those onion skins! Collect them in a freezer bag along with carrot peels and celery ends. Once you have a good amount, simmer them with water to make a rich, golden vegetable stock.
Also, if you have leftover buttermilk, use it as a marinade for chicken or a base for pancakes.
Serving Suggestions
These rings are heavy and salty, so you need something to cut through that richness. A zesty remoulade or a spicy chipotle mayo is the classic choice. For a bit of freshness, serve them with a side of tangy coleslaw.
If you're planning a full meal, these pair beautifully with something hearty. For example, my Marry Me Butter Beans provide a creamy, savory contrast that balances the fried crunch of the rings. Trust me, the combination of the creamy beans and the shatter crisp onion is a winner.
Alternatively, serve them as a side for a grilled steak or a smash burger. The key is to serve them the second they come off the wire rack. The moment they hit the table, that first crunch should be audible from across the room. Enjoy!
Recipe FAQs
Why do you soak onion rings in buttermilk?
It tenderizes the onion and helps the flour stick. The acidity breaks down the onion's structure while creating a tacky surface that ensures the coating adheres better.
How to make crispy batter for onion rings?
Whisk cornstarch into the all-purpose flour. Cornstarch interferes with gluten development and absorbs excess moisture, which creates a much crunchier exterior.
How do you keep batter from falling off onion rings?
Press the Panko breadcrumbs firmly into the floured rings. Ensuring the coating is packed tightly and maintaining the oil at 350°F prevents the batter from separating during frying.
Is it true I should soak onions in ice water before making onion rings?
No, this is a common misconception for this recipe. We use a buttermilk soak instead to provide a superior adhesive layer and a tangier flavor profile.
Can I freeze leftover onion rings?
Yes, you can freeze them for up to one month. Store them in an airtight container, though the texture may degrade slightly compared to freshly fried rings.
How to reheat onion rings without making them soggy?
Heat in an oven or air fryer at 375°F for about 5 minutes. Avoid using a microwave, as it will make the breading rubbery instead of crisp.
What is the best way to serve these onion rings?
Pair them with a savory main dish. These rings make an excellent side for a traditional shepherd's pie to balance the richness of the meal.
Crispy Buttermilk Onion Rings

