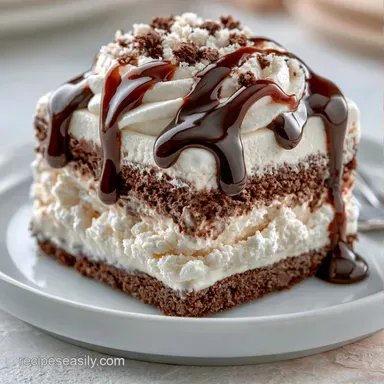
Ice Cream Cake Dessert Recipe: Bakery Style
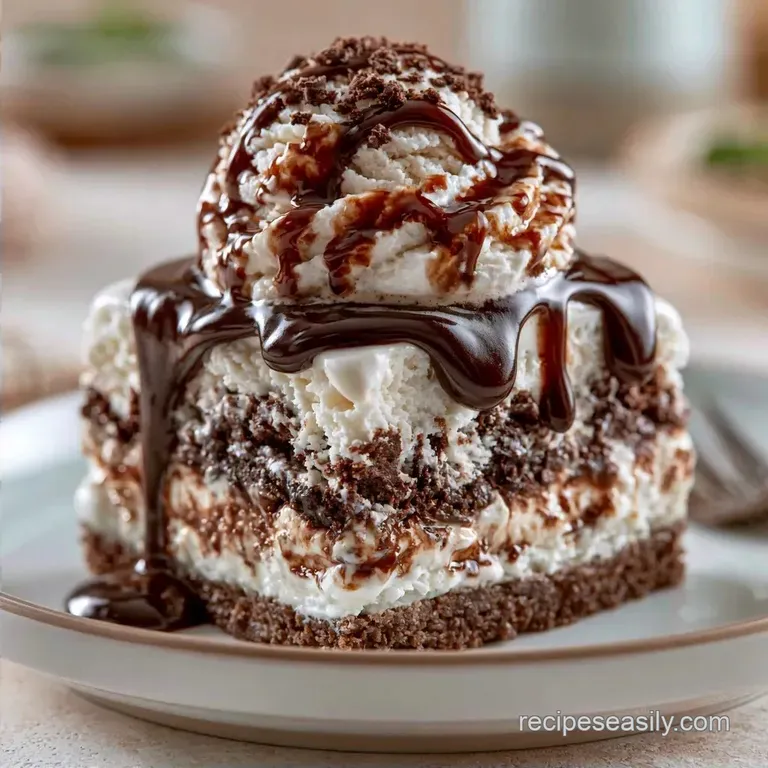
- Time: 60 min active + 6 hrs chilling
- Flavor/Texture Hook: Crisp fudge crunch meets smooth, creamy vanilla
- Perfect for: Birthday celebrations or summer get-togethers
Easy Ice Cream Cake Dessert Recipe
The aroma of melted chocolate and the click of the freezer door always take me back to my first attempt. To be honest, that first try was a total disaster. I layered room temperature ice cream onto a warm cake base, and the whole thing turned into a sugary soup before I could even get it in the freezer.
I spent an hour trying to scoop the mess back into a pan, but it was a lost cause.
That experience taught me that the secret isn't the ingredients, but the temperature. Once I began chilling the crust and softening the ice cream just enough to spread, everything changed. Now, this is the one treat my friends specifically request every year.
You can expect a rich, chocolatey base, two generous layers of cream, and a fudge cookie layer that actually snaps when you bite into it. This sweet creation doesn't require a high-end oven or hours of baking, making it a perfect choice for anyone who wants a big impact with minimal stress.
Why This Cake Hits Different
- Tempered Ice Cream: Softening the ice cream to a spreadable state prevents air gaps. This creates a dense, professional look when you slice into it.
- The Frozen Barrier: Chilling the base before adding the cream stops the crust from absorbing moisture. According to Serious Eats, managing moisture in frozen desserts is what prevents that grainy, icy texture.
The Ingredient Deep Dive
The hero here is the premium vanilla bean ice cream. I use a high fat version because it has less "overrun," which is the technical term for the air whipped into cheaper brands. Less air means the cake stays stable and doesn't collapse or shrink during the long freeze.
| Component | Purpose | Substitute Notes |
|---|---|---|
| Vanilla Ice Cream | Main body and creaminess | Use a store brand full fat vanilla for a budget swap |
| Chocolate Cake Crumbs | Structural base | Use crushed chocolate wafers for more snap |
| Hot Fudge | Texture contrast | Salted caramel sauce works for a different vibe |
| Heavy Cream | Stabilized topping | Mascarpone mixed with cream for a denser finish |
I've found that using basic cake crumbs is the most budget-friendly way to get a rich base. If you don't have pre made crumbs, you can just blitz a few slices of a cheap store-bought chocolate cake in a food processor.
Quick Recipe Specs
- Prep Time: 60 minutes
- Cook Time: 0 minutes
- Total Time: 7 hours
- Yield: 10 servings
Tools You'll Need
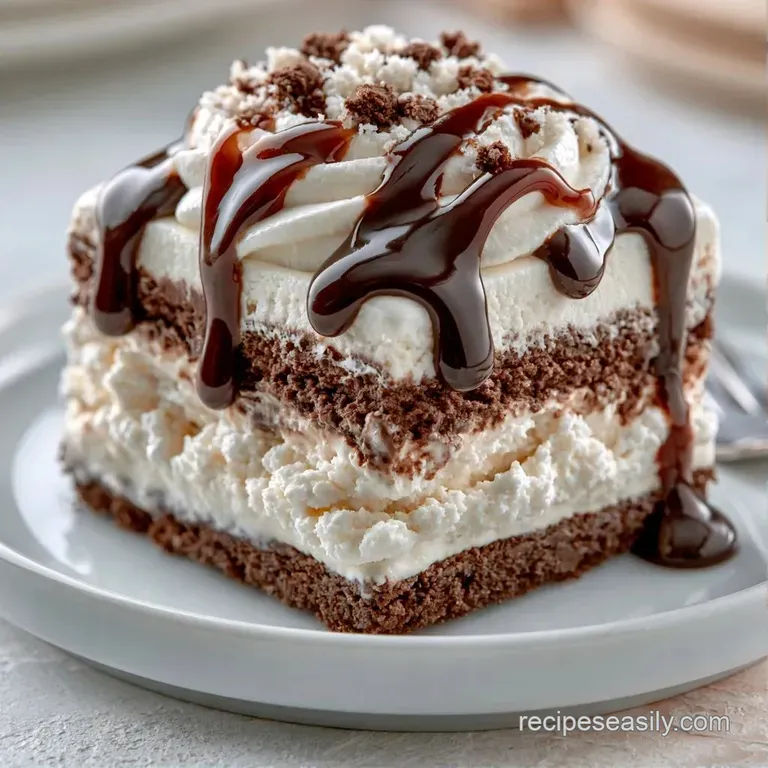
While any kitchen works, a few key tools simplify the job. A 9-inch springform pan is essential, since you can't exactly flip an ice cream cake to get it out.
I also recommend using an offset spatula. It helps you get the ice cream layers perfectly level so the cake doesn't lean. For the topping, a standard KitchenAid or a handheld mixer works great for the whipped cream.
Step-by-step Assembly
- Line the bottom of your springform pan with parchment paper.
- Combine 120g chocolate cake crumbs, 42g melted unsalted butter, and 12g granulated sugar in a bowl until it feels like wet sand.
- Press the mixture firmly into the bottom of the pan using the back of a spoon until flat.
- Place the pan in the freezer for 15 minutes until the base feels firm to the touch. Note: This prevents the ice cream from soaking into the cake.
- Whisk 1.4L softened vanilla bean ice cream until smooth but not melted.
- Spread the vanilla ice cream evenly over the chilled base, smoothing the top with your spatula.
- Repeat the whisking and spreading process with 1.4L chocolate ice cream.
- Drizzle 115g room temperature hot fudge over the chocolate layer and sprinkle 115g crushed Oreos or pecans on top.
- Press down lightly so the cookies embed into the fudge.
- Freeze for 6 hours until the sides feel rock solid.
- Carefully release the springform ring and beat 480ml cold heavy cream, 40g powdered sugar, and 5ml vanilla extract on medium high until stiff peaks form.
- Spread the whipped cream over the cake.
Fixes for Common Issues
It's easy to hit a snag with frozen desserts, especially if your kitchen is warm. The most common problem is the "slump," where the layers start to merge because the ice cream was too soft when it went in.
The Soggy Base
This happens when the crust isn't cold enough. If you add ice cream to a room temperature crust, the fats melt and soak into the crumbs, leaving you with a mushy bottom. Always do the 15 minute pre freeze.
The Grainy Topping
If your whipped cream looks like cottage cheese, you've overbeaten it. Once you see stiff peaks, stop immediately. If it's already overbeaten, you can sometimes save it by gently folding in a tablespoon of liquid heavy cream by hand.
The Jagged Slice
Ice cream sticks to the knife. To get those clean, bakery style edges, dip your knife in hot water and wipe it dry between every single cut.
| Problem | Fix |
|---|---|
| Layers are merging | Freeze the cake for an extra 2 hours |
| Crust is crumbling | Press the base harder with a flat glass |
| Cream is melting | Keep the cake in the freezer until 5 mins before serving |
Storage and Leftover Tips
This cake lives in the freezer. You can keep it stored for up to 2 weeks, but I recommend covering it with plastic wrap once the whipped cream is set. This stops the cake from absorbing "freezer smells" from things like frozen peas or fish.
If you have leftover cake crumbs or extra melted butter from the base, don't toss them. I usually mix the leftover crumbs with a bit of honey and toasted nuts to make a quick granola topping for yogurt.
For the best experience, take the cake out of the freezer and let it sit on the counter for about 5 to 10 minutes before slicing. This makes the crust less brittle and the ice cream a bit more creamy.
Serving and Slicing Tips
When you're ready to serve, use a long, thin knife. As mentioned, the hot water trick is your best friend here. I like to serve each slice with a few extra fresh berries to cut through the richness of the chocolate and cream.
If you're serving a crowd, you can place the cake on a chilled platter. This keeps the bottom from melting too quickly while you're chatting with your guests.
| Original Ingredient | Substitute | Why It Works |
|---|---|---|
| Oreos (115g) | Toasted Pecans (115g) | Adds a nutty crunch. Note: Less sweet than cookies |
| Vanilla Ice Cream | Strawberry Ice Cream | Fruity contrast. Note: Changes the color palette |
| Hot Fudge | Peanut Butter Melt | Salty sweet profile. Note: Much thicker consistency |
Flavor Swaps and Twists
This Ice Cream Cake Dessert Recipe is easy to customize based on what you have in your pantry. To reduce the chocolate intensity, try a vanilla wafer crust instead of cake crumbs. For a tangier flavor profile, you can add a layer of cream cheese frosting between the ice cream and the whipped cream.
If you enjoy other chilled desserts, you might like these cookie dough cheesecake bars, which use a similar freezing technique. If you prefer a traditional baked foundation, a homemade chocolate cake can be crumbled to create the base for this treat.
| Goal | What to change |
|---|---|
| More crunch | Double the Oreo layer |
| Less sweet | Use dark chocolate ice cream (70% cocoa) |
| Nutty flavor | Swap fudge for almond butter |
The Minty Dream
Use mint chocolate chip instead of chocolate ice cream. It provides a refreshing contrast to the vanilla layer and complements the chocolate crust perfectly.
The Peanut Butter Blast
Substitute the hot fudge with warmed peanut butter mixed with a touch of maple syrup. This turns the dessert into a candy bar-style treat that is always a hit with children.
Dairy-free Option
Substitute the ice cream with coconut-based vanilla and chocolate frozen desserts. For the crust, use melted coconut oil instead of butter. It works quite well, although the texture is a bit softer.
The Low Sugar Path
Opt for ice cream sweetened with monk fruit and use a sugar alternative for the crust. For the crunch layer, incorporate a small amount of sugar-free chocolate syrup.
Recipe FAQs
Is it true that you need an oven for this dessert?
No, and here's why. The crust uses cake crumbs and butter, making this a completely no-bake recipe. You can pair this cake with our brown butter caramel for extra richness.
How do I assemble the different layers?
Whisk softened vanilla ice cream until smooth and spread it over the chilled base. Add chocolate ice cream on top and finish with hot fudge and Oreos before freezing.
Can this cake be ready in 5 minutes?
That's a myth. You must freeze the cake for at least 6 hours or overnight so the sides feel rock-solid before releasing the pan.
Why is my cake melting too fast?
Take the cake out of the freezer only 5 to 10 minutes before you plan to eat. Leaving it out longer causes the layers to soften too much to slice cleanly.
Ice Cream Cake Dessert Recipe for 10