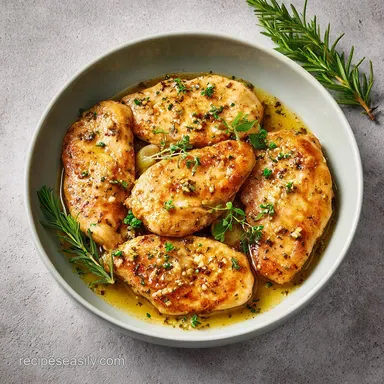
Garlic Butter Chicken Breast: Savory and Juicy
- Time: 5 min active + 15 min cook = Total 20 mins (plus 5 min rest)
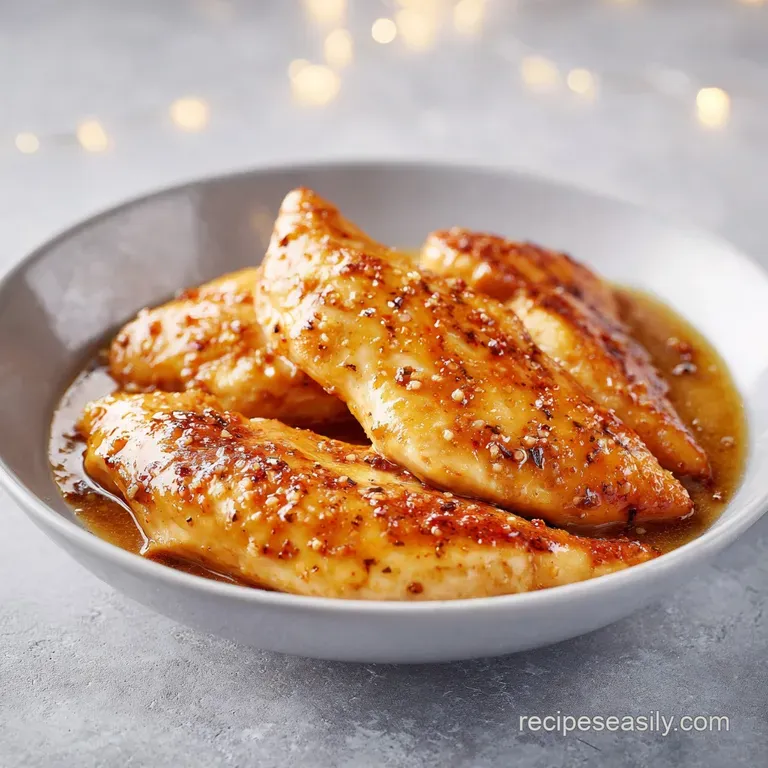
- Flavor/Texture Hook: Searing heat meets velvety, garlic infused butter
- Perfect for: Fast weeknight meals or an impressive date night dinner
- Delicious Chicken Breast Recipe with Garlic Butter you need to try
- What Nobody Tells You
- Recipe Specs
- Ingredients
- Equipment Needed
- From Prep to Plate
- What Can Go Wrong (and How to Fix It)
- Troubleshooting Common Issues
- Variations & Substitutions
- Keeping It Fresh
- Perfect Complements
- Recipe FAQs
- 📝 Recipe Card
Delicious Chicken Breast Recipe with Garlic Butter you need to try
That first sound is always the same: a loud, aggressive sizzle the second the meat hits the hot oil. I remember the first time I tried to replicate a classic French bistro chicken at home.
I had this vision of a velvety sauce and a deep gold crust, but I ended up with something that tasted like a rubber eraser because I was too scared to leave the chicken alone in the pan. I kept poking it, moving it, and flipping it every thirty seconds.
The trick, as I found out after a few disastrous dinners, is patience and a bit of bravery with the heat. This is the Delicious Chicken Breast Recipe with Garlic Butter you need to try because it strips away the fuss and focuses on two things: a hard sear and a luxurious butter bath.
It's the kind of meal that feels like a cheat code for your kitchen, turning a basic protein into something that feels expensive.
You can expect a meal that balances the bright tang of lemon with the rich, savory depth of toasted garlic. We aren't doing anything fancy with creams or complicated reductions here. We're just using heat and fat to create a crust that holds onto the juices, making sure every bite is tender.
Trust me on this, once you start basting your chicken in foaming butter, you'll never go back to plain grilled breasts.
What Nobody Tells You
Right then, let's talk about why this actually works. Most people think the "sear" is just for looks, but it's actually about flavor development. When you leave the chicken alone in a hot pan, you're creating a crust that tastes far more savory than steamed or poached meat.
- Uniform Thickness
- Pounding the meat ensures every part of the breast hits the pan at the same time, so the edges don't dry out before the center is cooked.
- Surface Moisture
- Patting the meat dry is non negotiable because water creates steam, and steam prevents that deep gold crust from forming.
- Butter Basting
- Pouring hot, foaming butter over the meat acts like a convection oven, cooking the top of the chicken while adding a rich, nutty flavor.
- Carryover Cooking
- Taking the meat off at 155°F allows the internal temp to rise to the safe 165°F mark while resting, keeping it from becoming dry.
If you're interested in the specifics of heat transfer, Serious Eats has some great deep dives into why pan searing is superior for texture.
Let's clear up a few things. First, searing meat does not "seal in the juices" - that's a total myth. Moisture loss happens regardless of how you start. The crust is purely about taste and texture. Second, you don't need a professional kitchen to get this result. A heavy pan and a bit of patience are all you need.
| Thickness | Temp | Rest | Cue |
|---|---|---|---|
| 3/4 inch | Med High | 5 mins | Deep gold crust |
Recipe Specs
Before we crack on, let's look at the technical side. This recipe is designed for speed without sacrificing the results. Because we are using boneless breasts, the cook time is minimal, but the resting period is where the magic happens.
The budget angle here is simple: we use basic pantry staples like paprika and olive oil, but we use the butter strategically at the end. This means you get that high end taste without needing a dozen expensive ingredients.
If you're watching your spending, you can even use a generic store brand unsalted butter, and it'll still taste brilliant.
Ingredients
Here is everything you'll need. I've kept this list lean and focused.
- 4 boneless, skinless chicken breasts (approx. 1.5 lbs / 680g) Why this? Uniform size ensures even cooking
- 2 tbsp olive oil Why this? High smoke point for the initial sear
- 1 tsp kosher salt Why this? Coarse grains penetrate meat better
- ½ tsp cracked black pepper Why this? Adds a sharp, woody heat
- ½ tsp paprika Why this? Mainly for that mahogany color
- 4 tbsp unsalted butter Why this? Pure fat for the velvety finish
- 4 cloves garlic, minced Why this? Fresh is non negotiable for aroma
- 1 tbsp fresh lemon juice Why this? Cuts through the heavy butter
- 1 tbsp fresh parsley, finely chopped Why this? Adds a fresh, grassy note
| Original Ingredient | Substitute | Why It Works |
|---|---|---|
| Unsalted Butter | Ghee (Clarified Butter) | Higher smoke point. Note: Lacks the slight milk solid nuttiness |
| Olive Oil | Avocado Oil | Very high smoke point. Note: Completely neutral flavor |
| Fresh Parsley | Dried Parsley | Similar look. Note: Much weaker flavor, use half amount |
| Lemon Juice | Apple Cider Vinegar | Provides acidity. Note: More fermented taste, less citrusy |
Equipment Needed
You don't need a fancy arsenal for this, but the pan matters. I highly recommend a 12 inch cast iron skillet. Cast iron holds heat better than almost anything else, which is exactly what you need for that initial sizzle.
If you don't have cast iron, a heavy bottomed stainless steel pan works too. Avoid non stick pans for this specific recipe if you can. Non stick pans can't handle the high heat needed for a proper sear, and they don't develop the same fond (those brown bits at the bottom) that makes the butter sauce so savory.
Finally,, grab a meat thermometer. Guessing when chicken is done is how you end up with dry meat or, worse, undercooked chicken. It's the only way to be 100% sure.
From Prep to Plate
Let's get into it. Follow these steps exactly, and you'll get a result that rivals any restaurant.
Phase 1: The Prep
- Place chicken breasts between two sheets of plastic wrap and lightly pound the thickest part until the breast is a uniform thickness of about 3/4 inch. Note: This prevents the thin end from overcooking
- Pat the chicken completely dry with paper towels. Rub both sides with salt, pepper, and paprika. Note: Dry meat sears; wet meat steams
Phase 2: The Golden Sear
- Set a 12 inch cast iron skillet or heavy bottomed stainless steel pan over medium high heat and add olive oil, heating until the oil shimmers.
- Carefully place chicken in the pan. Sear for 5–7 minutes per side without moving them, until a deep golden brown crust forms.
- Use a meat thermometer to ensure the internal temperature is reaching 155°F (68°C).
Phase 3: The Butter Baste
- Reduce heat to medium. Add the unsalted butter and minced garlic to the pan.
- Tilt the pan and use a spoon to continuously pour the foaming garlic butter over the chicken for the final 2–3 minutes of cooking. Note: The butter should be bubbling and nutty
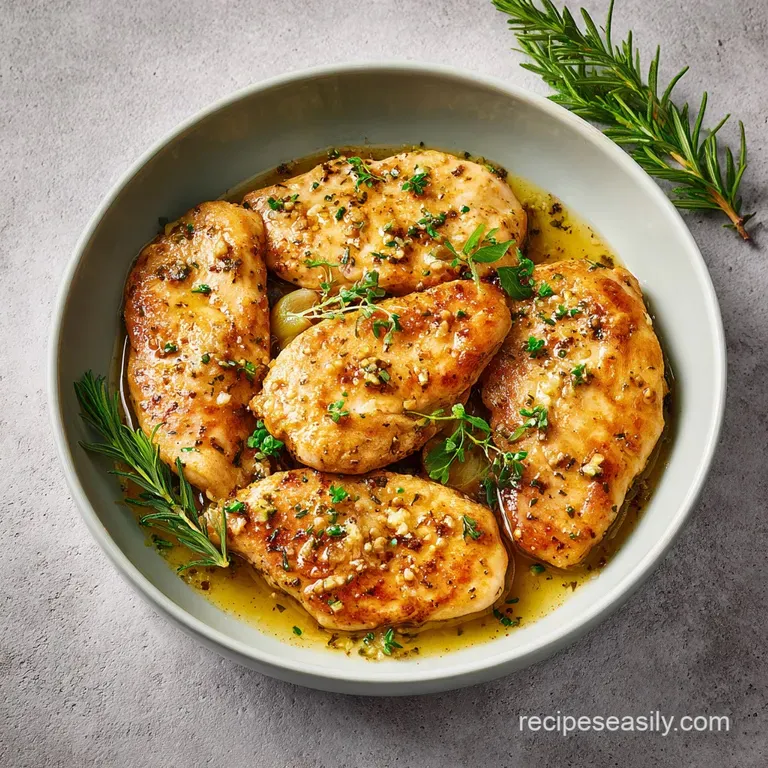
- Remove from heat. Squeeze fresh lemon juice over the breasts and garnish with chopped parsley.
- Let the meat rest for 5 minutes before serving. Note: This lets the juices redistribute
| Ingredient | Science Role | Pro Secret |
|---|---|---|
| Paprika | Color/Heat | Use smoked paprika for a grill like taste |
| Lemon Juice | Acidity | Add at the very end to keep it bright |
| Garlic | Aroma | Mince finely so it doesn't burn instantly |
| Butter | Emulsifier | Cold butter foams better when added to heat |
What Can Go Wrong (and How to Fix It)
Cooking chicken breasts is a balancing act. Because they're so lean, there's a very thin line between "juicy" and "cardboard."
Troubleshooting Common Issues
| Issue | Solution |
|---|---|
| Why Your Garlic Burns | If your pan is still at "sear" temperatures when you add the butter and garlic, the garlic will turn black in seconds. Burnt garlic is bitter and ruins the whole pan. Always drop the heat to medium be |
| Why Your Chicken is Dry | This usually happens because of two things: overcooking or skipping the rest. If you cook it to 165°F in the pan, by the time it hits your plate, it's actually 170°F or higher. Pull it at 155°F. |
| Why the Meat Sticks | If the chicken won't release from the pan, it's not ready. The meat will naturally "release" once the crust has fully formed. If you force it, you'll tear the crust off and leave it in the pan. |
Common Mistakes Checklist
- ✓ Pounding meat to a uniform thickness
- ✓ Patting the surface bone dry with paper towels
- ✓ Leaving the meat alone for 5-7 minutes per side
- ✓ Using a thermometer instead of cutting into the meat
- ✓ Resting the meat for at least 5 minutes
Variations & Substitutions
If you want to switch things up, this base is incredibly flexible. For a creamier version, you can stir in a splash of heavy cream during the basting phase to create a velvety sauce. If you're looking for something different, you might enjoy my creamy garlic chicken pasta which takes these flavors and turns them into a full meal.
For those on a low carb or keto diet, this recipe is already practically there. Just avoid any sugary rubs and keep the butter generous. If you find that pan searing is too intense for your schedule, you can try a slow cooker garlic chicken for a set it and forget it vibe.
Adjusting for Volume
If you're cooking for a crowd, don't crowd the pan. If you put 8 breasts in a 12 inch skillet, the temperature will drop, the meat will release water, and you'll end up boiling the chicken. Work in batches.
When doubling the recipe, don't double the salt and paprika exactly - start with 1.5x and taste. Liquids like lemon juice can be doubled, but the butter should be scaled based on the pan size, not the meat volume.
| Method | Time | Texture | Best For |
|---|---|---|---|
| Pan Sear | 20 mins | Crusty/Juicy | Quick Dinners |
| Oven Bake | 30 mins | Soft/Even | Large Groups |
| Slow Cook | 6 hours | Shreddy/Tender | Meal Prep |
Keeping It Fresh
Since this is a butter based dish, storage is straightforward. Store the cooked chicken and any leftover garlic butter in an airtight container in the fridge for up to 4 days.
To reheat, avoid the microwave if you can. Microwaves turn chicken breasts into rubber. Instead, put a teaspoon of water or butter in a pan over medium heat, add the chicken, and cover it with a lid for 3-4 minutes. This steams the meat back to life.
For zero waste, don't toss the leftover garlic butter in the pan! Pour it over steamed broccoli or use it to sauté some spinach. If you have chicken scraps or trimmings from the pounding process, toss them in a freezer bag for your next batch of homemade stock.
Perfect Complements
This dish is rich, so you need sides that provide a contrast. A crisp arugula salad with a sharp balsamic vinaigrette cuts through the butter perfectly. Alternatively, some roasted asparagus or sautéed green beans add a fresh, snap like texture that balances the velvety sauce.
If you want something heartier, a side of garlic mashed potatoes or a wild rice pilaf works well. Just remember that since the chicken has a strong garlic profile, keep the sides relatively simple so they don't compete for attention.
Finally, remember that the lemon squeeze at the end is what ties everything together. Don't skip it. That hit of acidity wakes up the fat and makes the whole dish feel lighter and more balanced. It's a simple trick, but it's the difference between a home cooked meal and a restaurant quality plate.
Recipe FAQs
How to cook chicken breast in garlic butter?
Sear seasoned breasts for 5 7 minutes per side over medium high heat in olive oil. Reduce heat to medium, add butter and garlic, and baste the meat for 2 3 minutes before finishing with lemon juice and parsley.
What are the ingredients in garlic butter chicken?
You will need chicken breasts, olive oil, salt, pepper, paprika, unsalted butter, garlic, lemon juice, and parsley. These simple staples create a rich, savory glaze.
Is chicken breast good for diabetics?
Yes, it is an excellent choice. Lean chicken breast provides high protein with very few carbohydrates, which helps maintain stable blood sugar levels.
What is the most delicious chicken dish in the world?
Taste is subjective, but garlic butter chicken is a top contender due to its aromatic crust. If you enjoy these savory profiles, you might also like a parmesan crusted version for a different texture.
Is it true that chicken must reach 165°F in the pan to be safe?
No, this is a common misconception. Pull the chicken at 155°F (68°C) because the temperature will continue to rise during the 5-minute resting period.
Why did my garlic turn bitter and black?
The pan temperature was too high. Always reduce the heat to medium before adding the butter and garlic to prevent them from scorching.
How to prevent the chicken from becoming dry?
Pound the breasts to a uniform 3/4 inch thickness and avoid overcooking. Pulling the meat at 155°F and letting it rest for 5 minutes ensures the juices redistribute.
Garlic Butter Chicken Breast