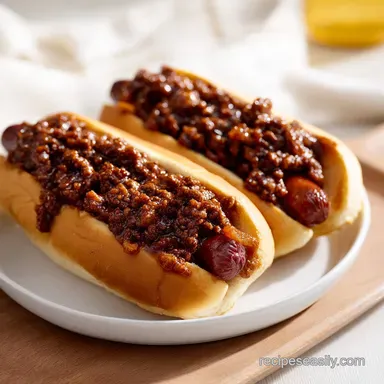
Easy Homemade Hotdog Chili Recipe: Savory and Rich
- Time: 10 min prep + 20 min cook = Total 30 mins
- Flavor/Texture Hook: Savory, glossy, and finely textured
- Perfect for: Quick weeknight dinners, game day snacks, or beginner cooks
- Easy Homemade Hotdog Chili Recipe
- The Secret to a Fine Texture
- Component Analysis
- Gathering Your Essentials
- Tools for a Quick Cleanup
- Step-by-Step Cooking Process
- Fixing Common Chili Mishaps
- Troubleshooting Common Issues
- Fun Variations to Try
- Storage and Zero Waste Tips
- Best Ways to Serve Your Chili
- Recipe FAQs
- 📝 Recipe Card
Easy Homemade Hotdog Chili Recipe
The smell of browning beef and toasted cumin hitting a hot pan is, for me, the smell of Saturday afternoons. I remember a specific family reunion years ago where we bought those canned "chili" toppings. They were metallic, overly sweet, and had that weird, gelatinous texture that just doesn't sit right.
I decided right then that I was never letting a can touch my hot dogs again.
I spent a few weekends playing around with ratios, trying to find that exact balance of tang and spice. I realized that the trick wasn't in simmering it for a whole day, but in how you handle the meat and the spices early on. You want a sauce that clings to the bun, not a chunky stew that rolls off the side of the dog.
Once I figured out the "bloom" and the acidity balance, this became my go to. This easy homemade hotdog chili recipe is designed for those of us who want the "all day" taste but only have 30 minutes before the guests arrive. It's rich, savory, and has just enough kick to make the mustard pop.
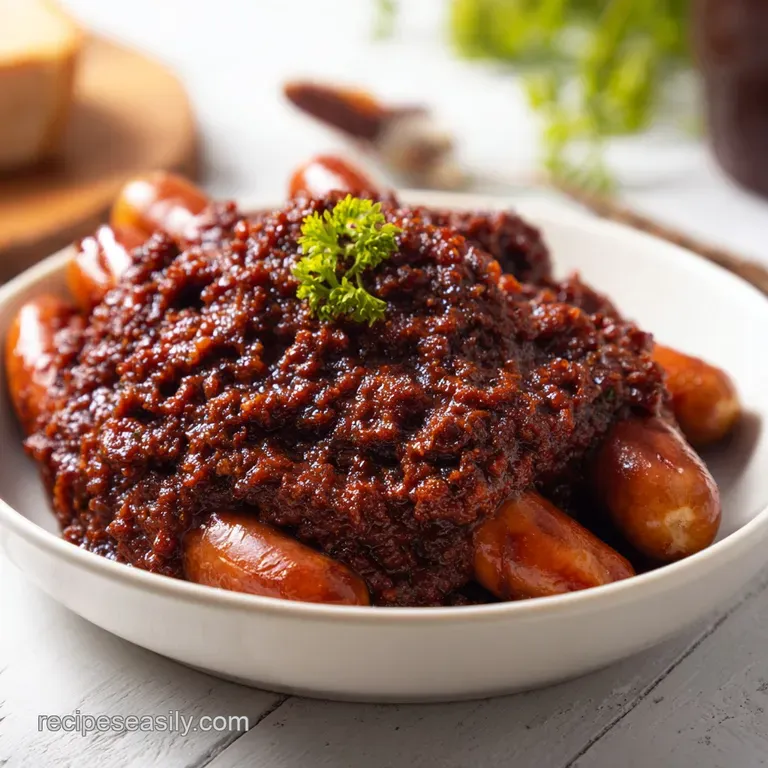
The Secret to a Fine Texture
You've probably had chili that feels like ground beef with some sauce. That's not what we're after here. We want a cohesive, almost velvety sauce where the meat is so finely broken down it feels like part of the liquid.
- Meat Breakdown
- Using a meat masher or a sturdy spatula to break beef into tiny crumbles increases the surface area, allowing the sauce to coat every single piece.
- Spice Blooming
- Frying the tomato paste and spices in beef fat before adding liquid releases oil soluble flavors that wouldn't otherwise activate. This is a technique often discussed on Serious Eats to deepen the overall profile of a dish.
- Acid Balance
- The apple cider vinegar cuts through the heavy fat of the beef, brightening the flavor so it doesn't feel "muddy" on your tongue.
- Liquid Reduction
- Simmering uncovered allows water to escape, concentrating the beef broth into a glossy glaze that sticks to the hot dog.
| Method | Time | Texture | Best For |
|---|---|---|---|
| Quick Simmer | 30 mins | Glossy & Fine | Weeknights / Fast Hosting |
| Slow Cooker | 6 hours | Soft & Integrated | Meal Prep / Low Effort |
| Traditional | 3 hours | Dense & Heavy | Winter Comfort / Large Pots |
Component Analysis
Understanding why these ingredients are here helps you tweak the recipe without breaking it. It's not just about the beef; it's about the layers of flavor.
| Ingredient | Science Role | Pro Secret |
|---|---|---|
| Tomato Paste | Thickener & Umami | Fry it until it turns dark red to remove the "raw" tin taste |
| Apple Cider Vinegar | pH Balance | Adds a subtle tang that mimics long simmered vinegars |
| Worcestershire Sauce | Flavor Complexity | Provides an anchor of salt and fermented depth |
| Lean Ground Beef | Protein Base | Use 90% lean to avoid a greasy pool of oil at the bottom |
Gathering Your Essentials
Right then, let's look at what you'll need. I've listed the exact measurements from my tried and true version. Trust me on the vinegar - it seems like a weird addition, but it's the reason this doesn't taste like generic taco meat.
- 1 lb lean ground beef (90% lean) Why this? Less grease means a cleaner, thicker sauce
- 1/2 cup finely diced yellow onion Why this? Provides a subtle sweetness without chunky bits
- 2 cloves minced garlic Why this? Essential aromatic base
- 3 tbsp tomato paste Why this? Creates the rich, red color and thick body
- 1 cup low sodium beef broth Why this? Controls salt while adding deep beefiness
- 2 tbsp chili powder Why this? The primary flavor driver
- 1 tsp ground cumin Why this? Adds an earthy, smoky undertone
- 1/2 tsp smoked paprika Why this? Gives a hint of outdoor grilling flavor
- 1 tbsp apple cider vinegar Why this? Cuts through the fat for a bright finish
- 1 tbsp Worcestershire sauce Why this? Adds "secret" savory notes
- 1/2 tsp salt Why this? Basic seasoning
- 1/4 tsp black pepper Why this? Subtle warmth
Quick Substitution Guide
| Original Ingredient | Substitute | Why It Works |
|---|---|---|
| Beef Broth (1 cup) | Water + 1 tsp beef bouillon | Similar salt/flavor profile. Note: Slightly less body |
| Apple Cider Vinegar | Red Wine Vinegar | Similar acidity levels. Note: Slightly more pungent |
| Lean Ground Beef | Ground Turkey (93%) | Leaner protein. Note: Lacks the same rich beefiness |
| Smoked Paprika | Regular Paprika + pinch of Cumin | Mimics the color and earthiness. Note: Lacks the "smoke" |
I once tried using ground chuck (80/20) for this, and I spent ten minutes draining grease before I could even start the sauce. Honestly, don't even bother with lower lean meats unless you love cleaning grease traps.
Tools for a Quick Cleanup
You don't need a professional kitchen for this. A few basic tools will get the job done. I prefer a wide skillet because it allows the liquid to evaporate faster, which means your chili thickens up in record time.
- A large skillet or a Dutch oven (Cast iron is great for heat retention)
- A meat masher or a stiff spatula (Essential for that fine texture)
- A wooden spoon for stirring
- Measuring spoons and a liquid measuring cup
Step-by-step Cooking Process
Let's crack on. The key here is the timing. Follow the checkpoints to make sure you don't burn the garlic or undercook the tomato paste.
- Heat your skillet or Dutch oven over medium heat. Toss in the diced onion and cook for 4-5 minutes until they're translucent and smelling sweet.
- Stir in the minced garlic and cook for just 30 seconds Note: Garlic burns fast, so don't let it sit.
- Crank the heat to medium high and add the ground beef. Use your masher or spatula to break the beef into the smallest crumbles possible. Cook until the beef is fully browned and no pink remains.
- Stir in the tomato paste. Now, add the chili powder, cumin, and smoked paprika. Stir constantly for 1 minute until the spices smell toasted and the paste darkens.
- Pour in the beef broth, apple cider vinegar, and Worcestershire sauce.
- Stir in the salt and black pepper.
- Turn the heat down to low. Let it simmer uncovered for 10-15 minutes, stirring every few minutes until the sauce is rich, glossy, and thick enough to coat a spoon.
- Remove from heat. Let it sit for 2 minutes before serving; it'll thicken slightly more as it cools.
Fixing Common Chili Mishaps
Even with a simple recipe, things can go sideways. Usually, it's a matter of heat management or liquid ratios.
Troubleshooting Common Issues
| Issue | Solution |
|---|---|
| Why Your Chili is Too Runny | If your sauce looks more like soup than a topping, you likely didn't simmer it long enough or used a lid. Always simmer uncovered to let the steam escape. If you're in a rush, simmer on medium low for |
| Why Your Chili Tastes Bitter | This usually happens if the tomato paste was burnt or the spices were scorched. If it's slightly bitter, a pinch of brown sugar can neutralize the acidity and bitterness. |
| Why Your Meat is Chunky | If you didn't break the beef down enough at the start, you'll have "meatballs" in your sauce. You can actually use a whisk or a potato masher after the liquid is added to break up any remaining clum |
Mistake Proof Checklist
- ✓ Onion is soft before beef goes in
- ✓ Beef is broken into tiny, uniform crumbles
- ✓ Tomato paste is fried (bloomed) with spices
- ✓ Pan remains uncovered during the final simmer
- ✓ Final consistency is glossy, not watery
Fun Variations to Try
Once you've nailed the base, you can take this in a few different directions. This is where you can get creative based on what's in your pantry.
The Heat Seeker Version If you want more punch, add 1/2 tsp of cayenne pepper or a tablespoon of chopped chipotle in adobo during the spice blooming step. It adds a smoky, creeping heat that's addictive.
Turning it into Crockpot Hot Dog Chili For those who prefer a slow cooker hot dog chili recipe, simply sauté the onions, garlic, and beef in a pan first. Transfer everything to the slow cooker, add all other ingredients, and cook on Low for 6 hours or High for 3 hours.
Because it's a closed environment, you may need to stir in an extra tablespoon of tomato paste at the end to reach the desired thickness.
The Plant Based Swap You can replace the beef with 1 lb of crumbled tempeh or a high-quality plant based ground. If using tempeh, sauté it with a bit of soy sauce first to mimic the savory beef flavor. For a side, these topping heavy dogs go great with some homemade dinner rolls for a full feast.
Decision Shortcut
- If you want a smokier flavor → add a drop of liquid smoke or more smoked paprika.
- If you want a "Cincinnati" style → add a pinch of cinnamon and a teaspoon of cocoa powder.
- If you want it leaner → replace beef broth with unsalted vegetable stock.
Storage and Zero Waste Tips
This chili actually tastes better the next day because the flavors have more time to meld together.
Storing Your Chili Place the cooled chili in an airtight container in the fridge for up to 4 days. For longer storage, this freezes beautifully. Put it in freezer bags, squeeze out the air, and it'll stay fresh for up to 3 months.
Reheating Tips When reheating, add a tablespoon of water or beef broth to the pan. The sauce thickens in the fridge, and a little liquid helps it return to that glossy, velvety state without burning.
Zero Waste Ideas If you have a small amount of chili left over, don't toss it! Use it as a base for a quick "chili mac" by stirring it into cooked elbow macaroni with a handful of cheddar cheese. You can also spoon it over a baked potato or use it as a topping for nachos.
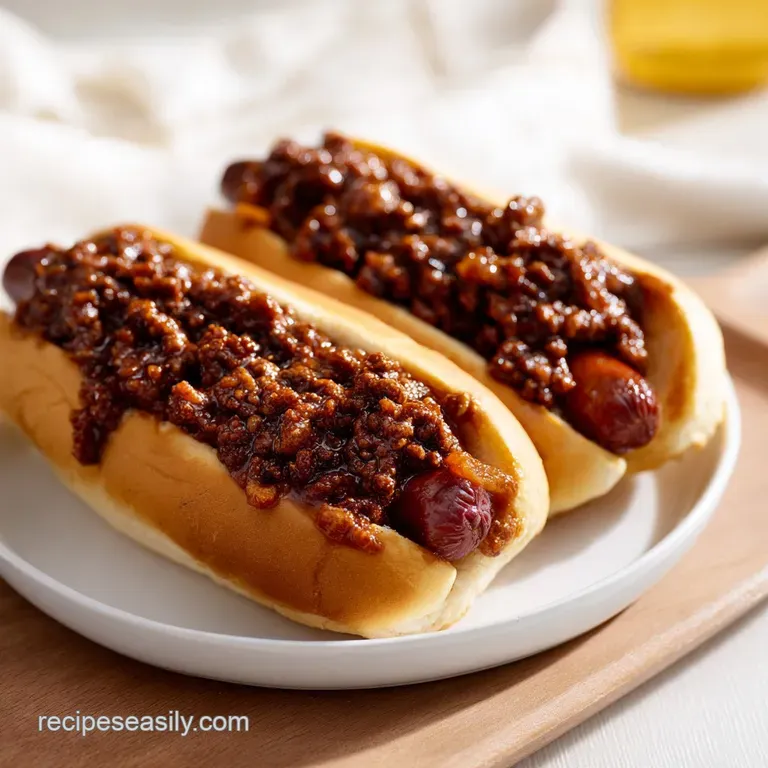
Best Ways to Serve Your Chili
The dog is just the vehicle; the toppings are the destination. I'm a firm believer that you shouldn't be shy with the garnishes.
The Classic Coney Load your hot dog with a generous scoop of this chili, a line of yellow mustard, and a mountain of finely diced white onion. Use a steamed bun for that authentic street cart feel.
The Tex Mex Style Top the chili covered dog with shredded sharp cheddar, pickled jalapeños, and a dollop of sour cream. This version is heavier but feels like a full meal.
The Gourmet Twist Try using a brioche bun and adding a slice of melted pepper jack cheese under the chili. If you're serving a crowd, offer a side of my classic yellow cake for a sweet finish to the savory meal.
Trust me, once you try this easy homemade hotdog chili recipe, you'll realize how much you've been missing by using the store-bought stuff. It's a simple upgrade that makes a massive difference in the final bite. Enjoy!
Recipe FAQs
How to make homemade chili for hot dog?
Sauté onion and garlic, brown finely crumbled beef, then stir in tomato paste and spices. Simmer with beef broth, apple cider vinegar, and Worcestershire sauce for 10-15 minutes uncovered until thick.
What makes hot dog chili different?
The texture is much finer and the consistency is glossier. Unlike chunky beef chili, this version requires breaking the meat into the smallest crumbles possible to serve as a smooth topping.
What is the secret ingredient to amazing chili?
Apple cider vinegar and Worcestershire sauce. These provide the necessary acidity and savory depth that cut through the richness of the ground beef.
What's the best way to make hot dogs for chili dogs?
Grill or pan-sear the hot dogs until charred. This creates a smoky flavor and firm snap that contrasts perfectly with the soft, rich chili.
Why is my chili too runny?
Simmer the sauce uncovered for a longer period. Steam must escape for the liquid to reduce; using a lid traps moisture and prevents the sauce from thickening.
How long does the chili last in the fridge?
Store in an airtight container for up to 4 days. For longer preservation, freeze the chili in airtight bags for up to 3 months.
What can I serve with chili dogs?
Crispy french fries or a fresh coleslaw are classic pairings. For another hearty family meal, try our baked spaghetti recipe.
Homemade Hotdog Chili Recipe